Deployments on Fleek
Deploying a site using Fleek’s pipeline is a simple process. You can connect your code repository to Fleek and we will take care of the build and deployment process. This allows you to focus on your code without worrying about the infrastructure.
This is a multi-step process that will require you to connect your code repository, configure your build settings and deploy your site.
Connect your code repository
The first step is to connect your code repository to Fleek. You can do this by going to the ‘Sites’ section and clicking on the ‘Connect Repository’ button.
In this process, you will need to select the repository provider and authorize Fleek to access your repository. Once you have authorized Fleek, you will be able to select the repository and branch you want to deploy.
Select your repository and branch
The second step is to select the repository. By giving access to Fleek, we will be listing all the available repositories you have access to. You can select the repository you wish to deploy to as well as the branch you wish to deploy to.
Configure your build settings
Fleek will automatically recognize the framework, build commands and publish directory for your site. If you wish to customize this, you can do so in the ‘Build settings’ section.
In the ‘Advanced settings’ section, you can also configure the environment variables you want to use in your build process.
Build parameters
These are the build parameters you can configure:
Framework: The framework used to build your site, e.g. Gatsby, Hugo, etc.Build command: The commands to execute to build the site, e.g.npm install && npm run buildPublish directory: The name of the directory containing theindex.htmlfile of your site after it has been builtDocker image: The name of the docker image on DockerHub in which your site will be built, defaulting tonode:slim.Fleek provides images for many popular frameworks, but you can use any that suit your project.Environment variables: The values of your environment variables. It is here for example that you may set your environment toproduction.
After creating the site
Once your site has been created, we will trigger the initial deployment. This process can take several minutes for some sites. Once the deployment is complete, you will be able to see the site URL and the status of the deployment.
Monitor the deployment
You can monitor the deployment process by clicking on the ‘Deploys’ tab on the ‘Site Overview’ page. You will find the list of all the deployments for your site and the status of each deployment. By clicking on the deployment, you will be able to see the logs of the deployment process.
In the event a deployment fails, you can retry it directly from the ‘Deploys’ page.
Configure your custom domain
Once the deployment is completed, you will be able to configure your custom domain. To do so, go to the ‘Settings’ page and click on the ‘Domains’ tab. On this page, you will be able to add your custom domain and configure it to use your site.
You can follow a guide on configuring your custom domain here.
Configure your ENS domain
You can also configure your ENS domain. To do this, go to the ‘Settings’ page and click on the ‘Domains’ tab. On this page, you will be able to add your ENS domain and configure it to use your site.
You can follow a guide on how to configure your ENS domain here.
Concurrent deployments
Currently Fleek supports one deployment at a time. This means that if you trigger a new deployment while another one is running, the new deployment will be queued and will start once the current deployment is completed. Setting up concurrent deployments will be possible once our new billing structure is live with support for this deployment option.
Previewing a deployment
Deploy previews
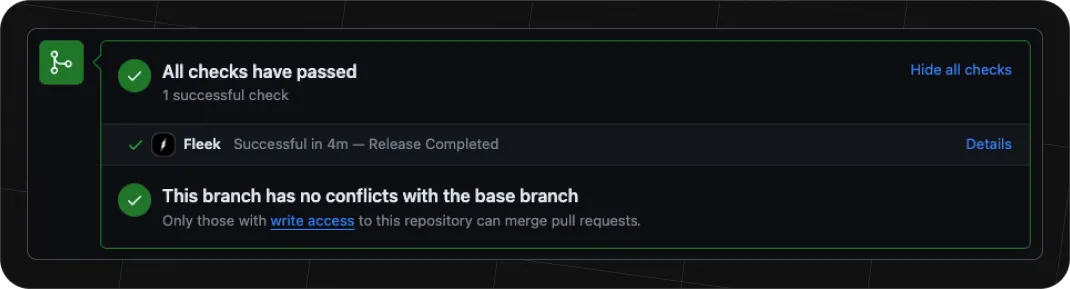
Deploy previews allow you to preview a deployment before pushing it to production. You can safely view what your site will look like before you merge the pull request.
It should come in handy when you want to make sure that everything is in order with the changes you want to make and avoid surprises due to unfortunate oversights.
Enabling deployment previews
To enable previews, you need to go to the ‘Settings’ page of your site and click on the ‘Build & Deploy’ tab. In the Deploy Contexts box you will find the option to enable previews. Once enabled, Fleek will automatically create a preview for each pull request you open in your repository to the production branch.

Viewing deploy previews
To start a deploy preview, simply create a pull request to your production branch. The deploy preview will appear in the list of deploys of the site.
Click on the deploy tagged Deploy Preview to view it!

In addition, you are able to view the deploy preview right from the github page of your pull request. Very handy for developers wanting to see the changes resulting from a pull request!
Purging the cache

If your website is not reflecting the latest changes you’ve made, you might have a cache-refresh issue. A previous cache layer might be being held by the CDN, and what you’re seeing is the website from the cache layer, not the most updated version.
Fortunately, purging the cache manually fixes this and you can do it right from the Fleek app if needed.
In the ‘Hosting’ section, find the affected site, and visit the ‘Settings’ page. In the ‘General’ tab you will find the section for purging the cache. Click this button to purge the cache and the process will be triggered.
Deleting a site
To delete a site, go to the ‘Site overview’ page and click on the ‘Settings’ icon. In the ‘General settings’ page, click on the ‘Delete site’ button. This will remove the site from your account and will no longer serve your site’s content. You will be asked to confirm the removal of all associated resources within the site. All information related to the site will be removed from the platform, including each of the associated domains and each of the IPNS keys.
Deleting a site will remove all the deployments and domains associated with the site. This action cannot be undone.

Setting up a self-managed deployment
To set up a self-managed deployment, create a site and choose the option to manage the deployment via the Fleek CLI, at the bottom of the Git provider screen.
To set up the site, you will need to add some information about it:
Framework: The framework used to build your site, e.g. Gatsby, Hugo, etc.Build command: The commands to execute to build the site, e.g.npm install && npm run buildPublish directory: The name of the directory containing theindex.htmlfile of your site after it has been built
With this, you will be redirected to the ‘Site overview’ page where you will find two different files that you need to add to your repository:
Fleek.json: This file contains the configuration of your site.GHA workflow: This file contains the configuration of the Github Action workflow that will trigger the deployment process.
Though the Fleek.json file is mandatory, you can elect not to use the Github Action workflow and trigger the deploy process in your own way.
Deploying your site
To deploy your site using the Fleek CLI, you can follow the guide in the CLI section.