How to Create a Telegram Social Media AI Agent Using OpenAI on Fleek
Social media chatbots are revolutionizing online engagement, helping brands, creators, and businesses automate conversations, interact with followers, and provide instant responses. With OpenAI and Fleek, you can create your own AI-powered social media assistant that seamlessly integrates with Telegram, responding to messages, answering questions, and keeping your community engaged—24/7.
Fleek makes this process fast and effortless by offering a pre-made Social Pack template, eliminating the need for complex coding or infrastructure setup. Whether you’re building a Telegram bot for customer support, automated FAQs, or interactive social engagement, this guide will show you how to customize and deploy your AI assistant in just a few clicks.
Overview of What We’ll Build
We’ll be creating a social media AI agent that runs on Telegram, designed for engaging with audiences, responding to users, and automating interactions. Using Fleek’s Social Pack template, you’ll be able to:
✅ Customize your AI’s personality – Set a name, bio, and conversation style to match your brand or persona.
✅ Use OpenAI to power responses – Leverage one of the most advanced AI models for intelligent replies.
✅ Deploy instantly to Telegram – Let your AI chat with users in real time, just like a human assistant.
✅ Automation for social media – Create an AI agent that interacts with followers, answers common questions, or even posts updates.
✅ Choose between basic or advanced features – Keep it simple or integrate plugins for added functionality.
✅ Get it live in minutes – No coding, no infrastructure, just a few clicks.
This guide is perfect for content creators, community managers, businesses, and developers looking to build a Telegram chatbot that enhances their social media engagement.
Now, let’s get started! 🚀
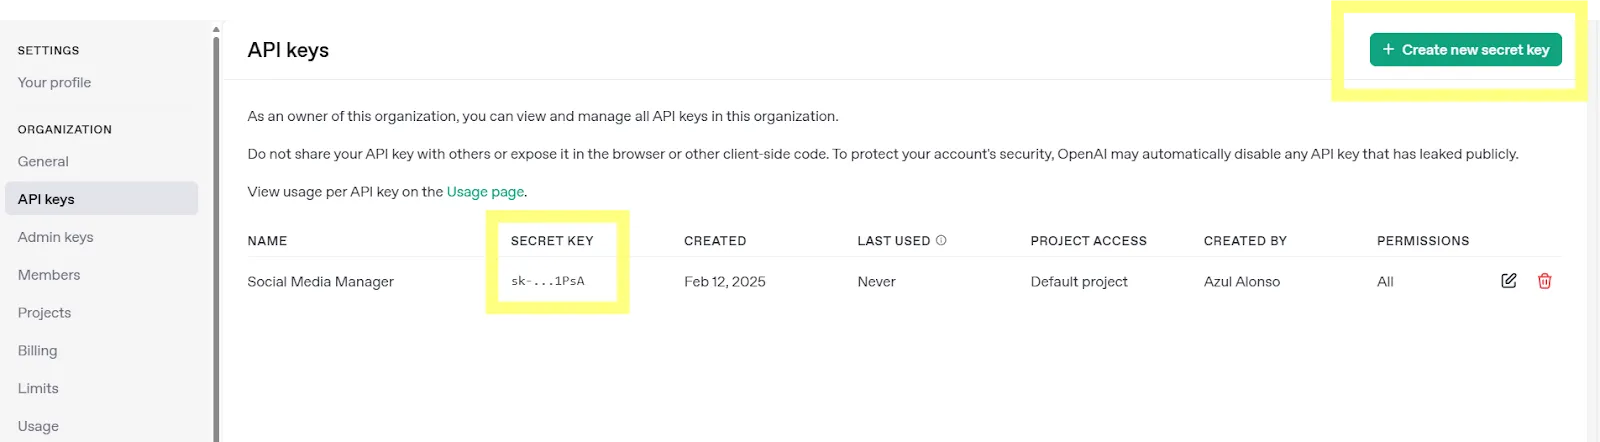
Step 1: Get Your OpenAI API Key
To power your AI agent, you’ll need an OpenAI API key. Here’s how to get one:
- Go to the OpenAI platform → https://platform.openai.com/signup
- Sign up or log in → If you don’t have an account, create one.
- Navigate to the API Keys section → Found in your account settings.
- Generate a new API key → Click “Create API Key” and copy the key.
- Store it securely → You’ll need this key in later steps.
💡 Tip: Never share your API key publicly, as it grants access to your OpenAI usage.
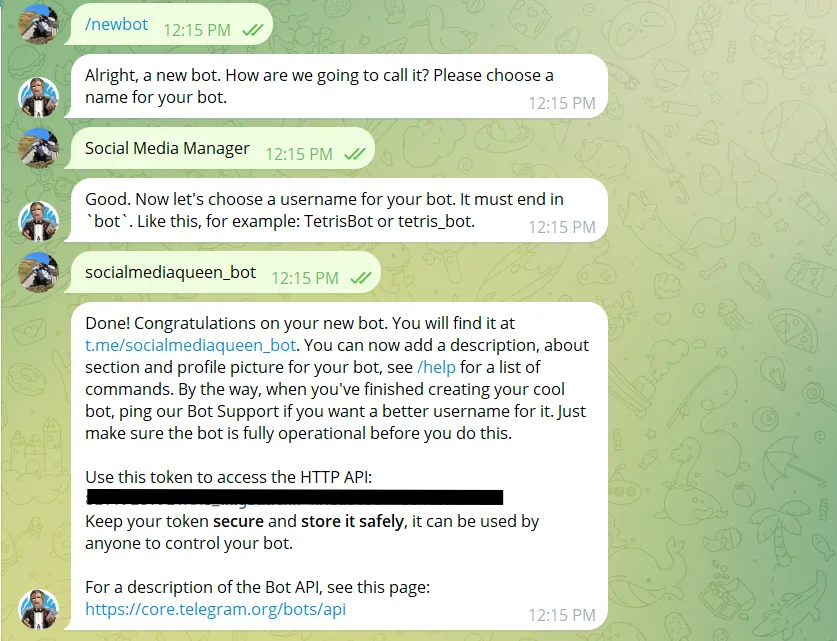
Step 2: Set Up Telegram Bot Credentials
Your AI agent needs a Telegram Bot Token to function. Follow these steps to generate one:
- Open Telegram and search for BotFather (the official Telegram bot for managing bots).
- Start a chat with BotFather and send the command: /newbot
- Follow the setup prompts → Provide a name and username for your bot.
- Copy the bot token provided by BotFather.
You’ll need this token when deploying your agent on Fleek.
💡 Tip: Never share your API key publicly
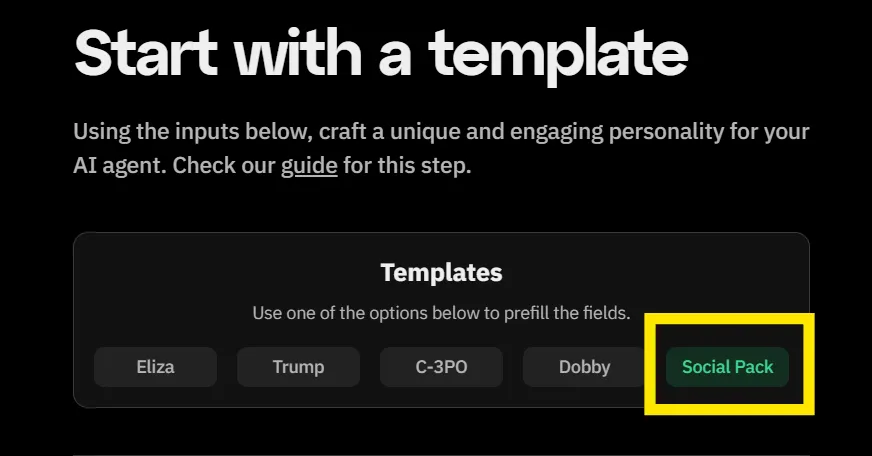
Step 3: Customize Your AI Agent’s Personality
Now that we have our API keys, it’s time to personalize your AI agent and configure it to work on Telegram.
- Go to fleek.xyz/agents/
- Click “Start with a Template.”
- Choose the “Social Pack” Template
- This template is designed for social media chatbots, making it the best choice for a Telegram AI agent.
- Select OpenAI as the Model Provider
- Toggle OpenAI as your AI model provider.
- Select Telegram as the Client
- Choose Telegram as the platform where your bot will operate.
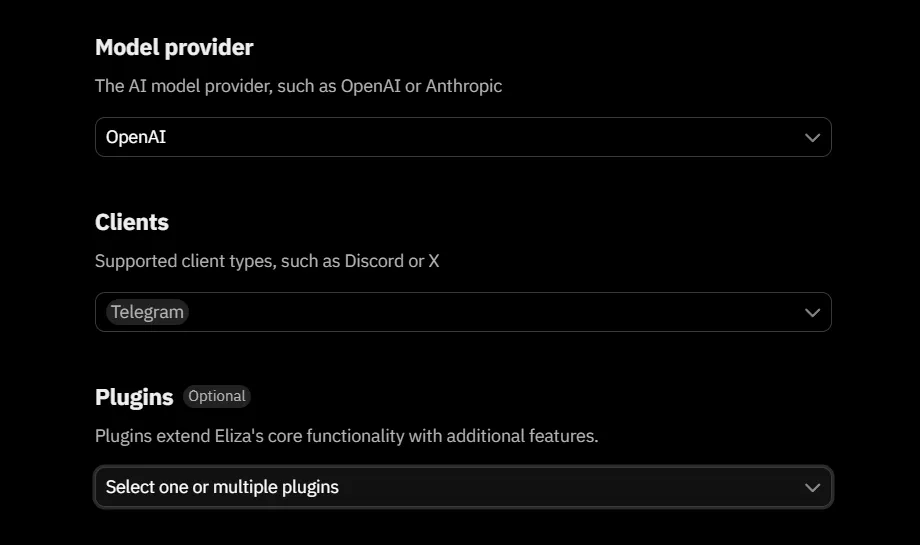
Plugins: Keep Them or Disable Them?
- For Beginners:
- Unselect all plugins to keep the bot simple and focused on being a social media chat assistant.
- This is the easiest way to quickly deploy a chatbot without any extra setup.
- For Advanced Users:
- You can keep plugins enabled for additional functionality, like enhanced API integrations.
- Some plugins require additional API keys (e.g., retrieval plugins, external API calls).
- Be aware that some third-party plugins may have additional costs depending on the service.
Once you’ve selected OpenAI, Telegram, and configured your plugins, your AI agent is ready for deployment! 🎉
Step 4: Deploy on Fleek
Now, let’s get your AI bot live!
-
Go to the Fleek Deployment Settings
-
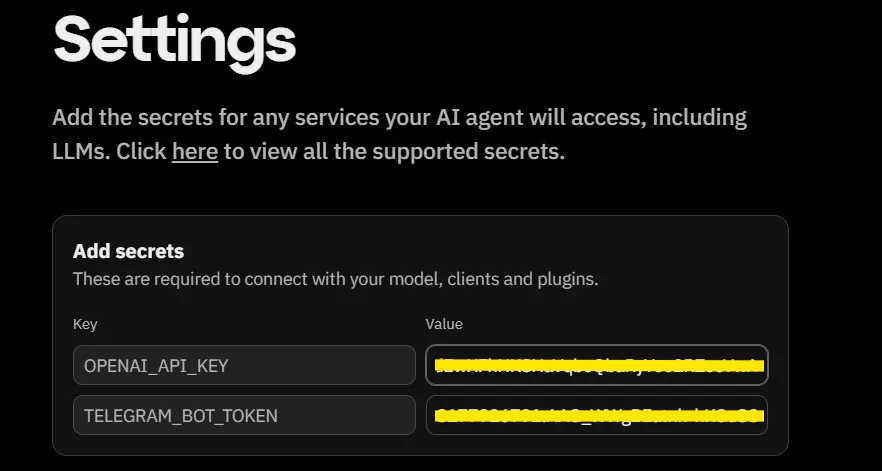
Enter Your API Keys
In the “Add Secrets” section, fill in:
- OPENAI_API_KEY → Paste the API key from OpenAI.
- TELEGRAM_BOT_TOKEN → Enter the Telegram bot token from BotFather.
- Review Your Character
- Click “Review Character” to confirm all your settings.
- Click “Deploy Agent”
- This will deploy your AI agent instantly on Fleek

Step 5: Start Chatting on Telegram!
Once your AI agent is live, your Telegram bot will be ready to use automatically—all you need to do is activate it!
How to Test Your Bot:
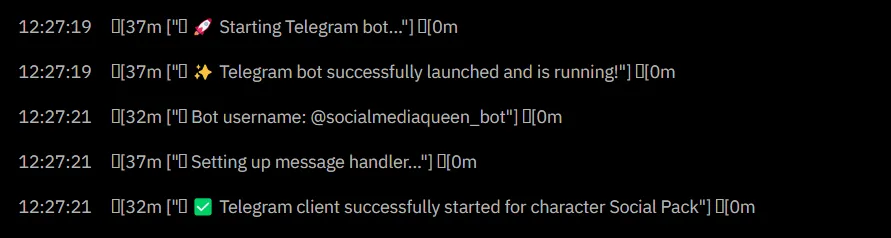
- Visit the Dashboard and View Logs
- Click View Logs.
- Refresh the logs to ensure everything is up to date.
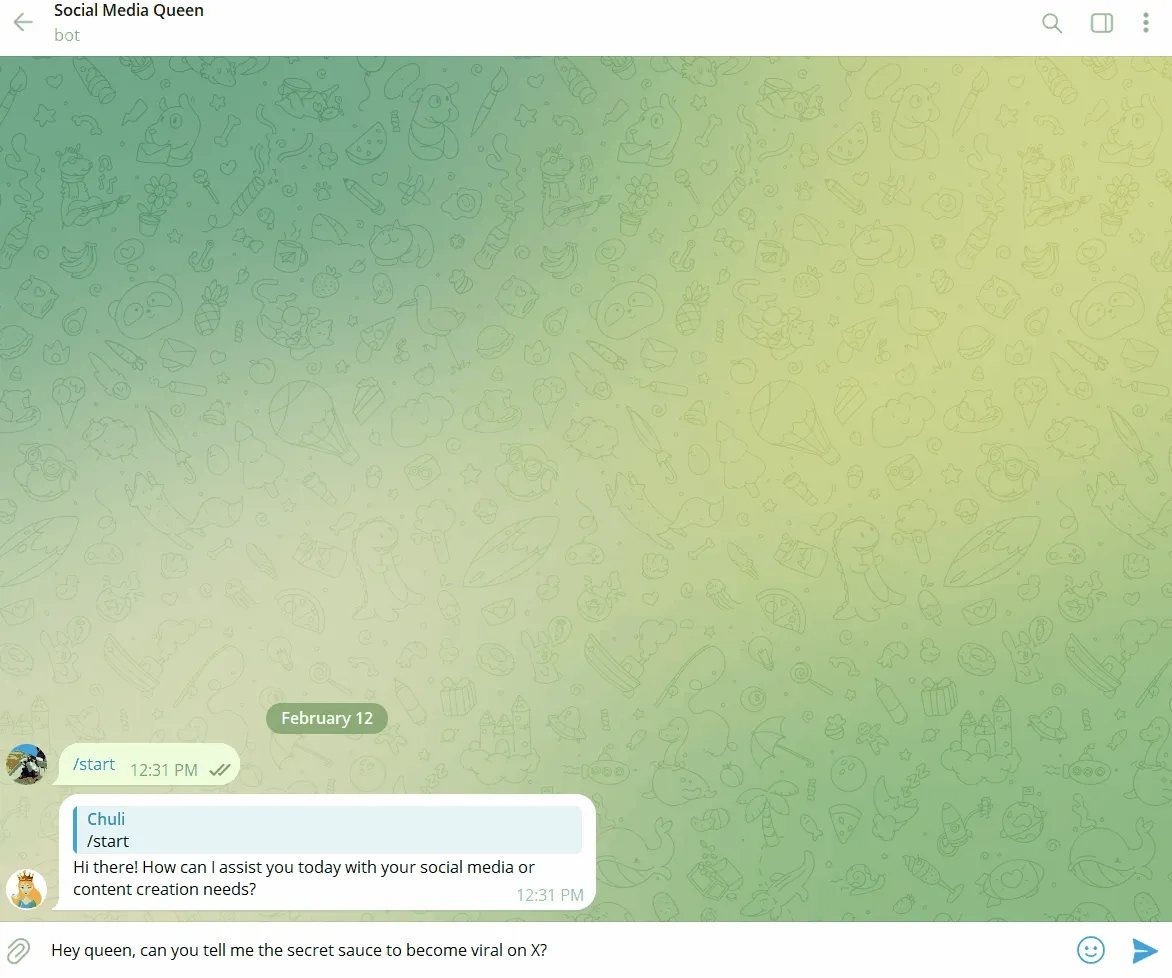
- Go back to telegram
- Open the link provided by Telegram.
- Click Start to activate your bot.
- Start Chatting!
- Send a message—your AI should now respond instantly using OpenAI! 🎉
- Customize Your Bot (Optional)
- You can now add a description, about section, and profile picture to make your bot more personalized.
- Type /help in BotFather the chat to see available commands.
- If you want a better bot username, you can contact Telegram Bot Support, but make sure your bot is fully operational first.
The 3-Minute Challenge
Now that you’ve built your AI agent, we challenge you to deploy it in under 3 minutes!
- Follow the steps outlined in this guide.
- Time yourself and see how fast you can launch your bot.
- Once your bot is live, post your results on X and tag Fleek!
With Fleek and OpenAI, deploying AI agents has never been easier. Ready, set, deploy! 🚀
Want to Deploy AI Even Faster?
Explore more templates on Fleek Eliza and launch your next AI project in seconds.