How To Deploy A React App To Fleek: A Step-by-Step Guide for Developers

You can rapidly bootstrap a React application using create-react-app, and with Fleek, you can deploy it in just a few minutes. In this guide, we’ll go over how to:
- Create a Fleek Account
- Clone the react boilerplate GitHub Repo
- Deploying your app on Fleek
Let’s go!
Prerequisites
- NodeJs 8+
- NPM 5.6+
- Fleek Account
Fleek deployment
Step 1: Fleek account creation
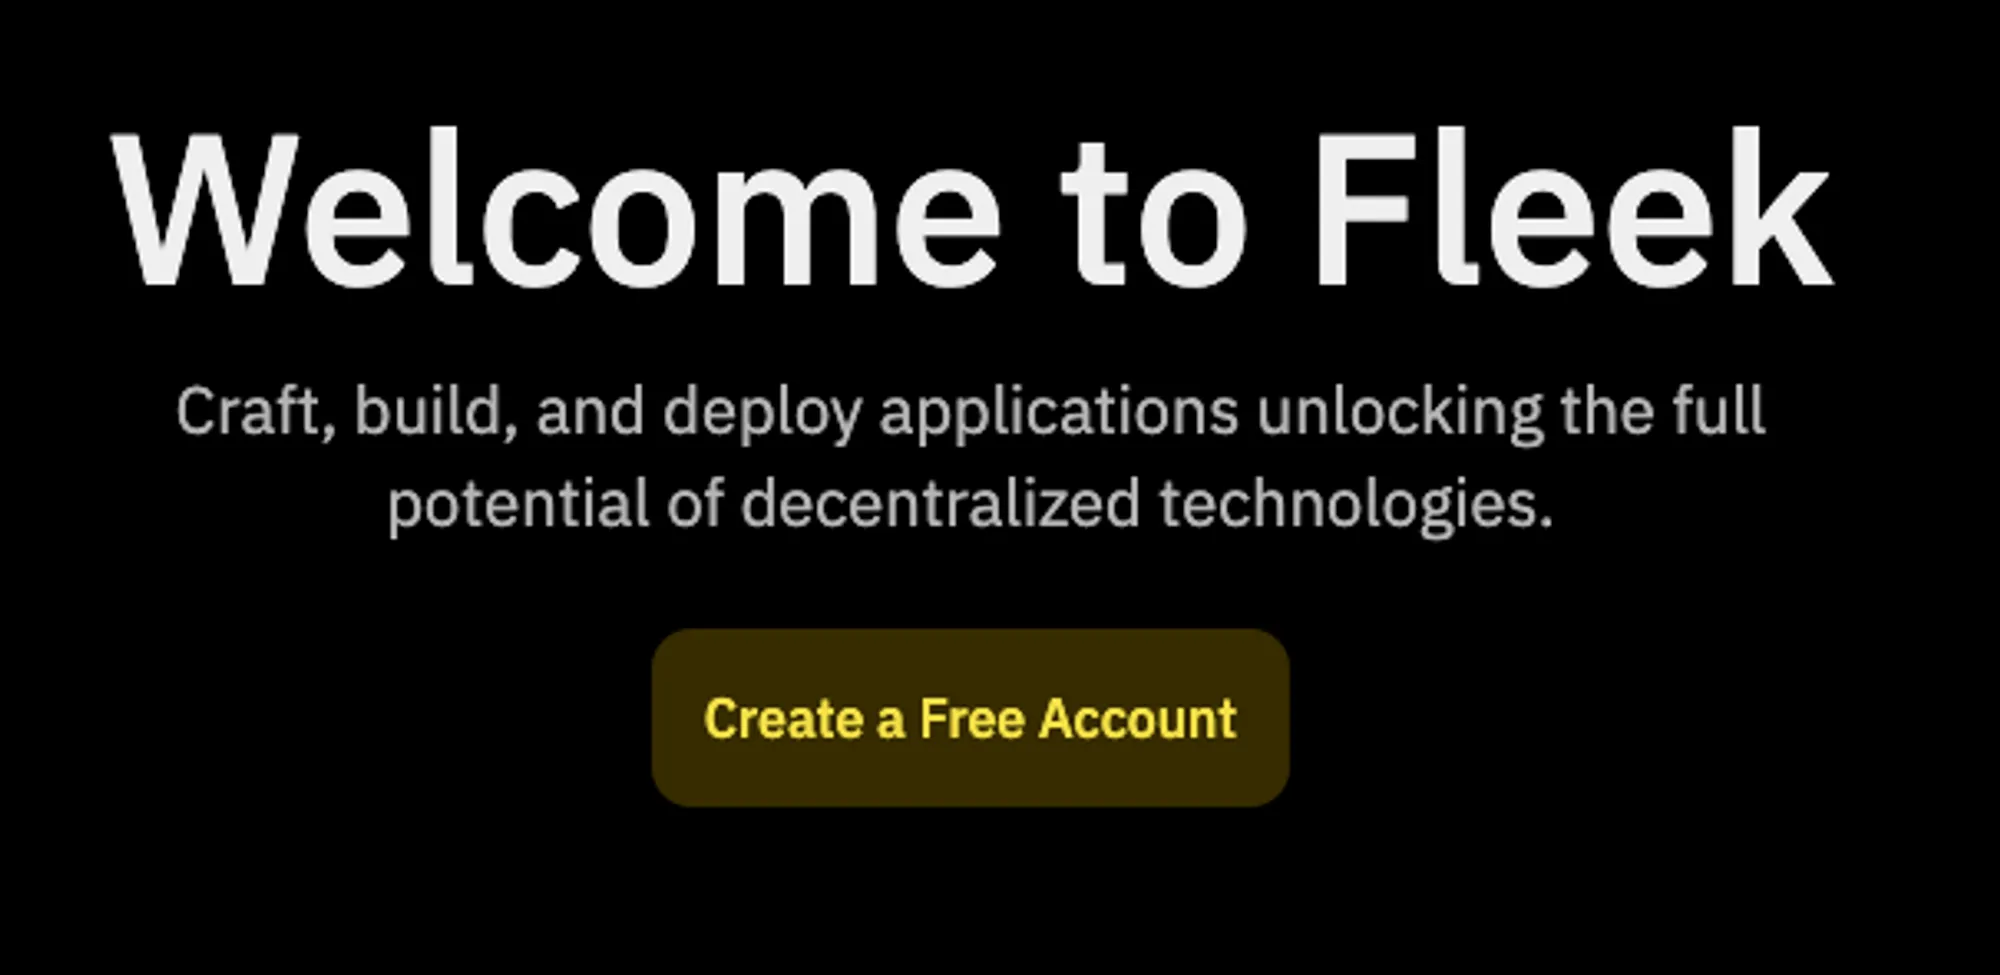
The first thing we’ll need to do is create a Fleek account: head over to https://fleek.xyz/dashboard, and click on the Create a Free Account button.
💡 Feel free to skip this step if you already have an account on Fleek.xyz!
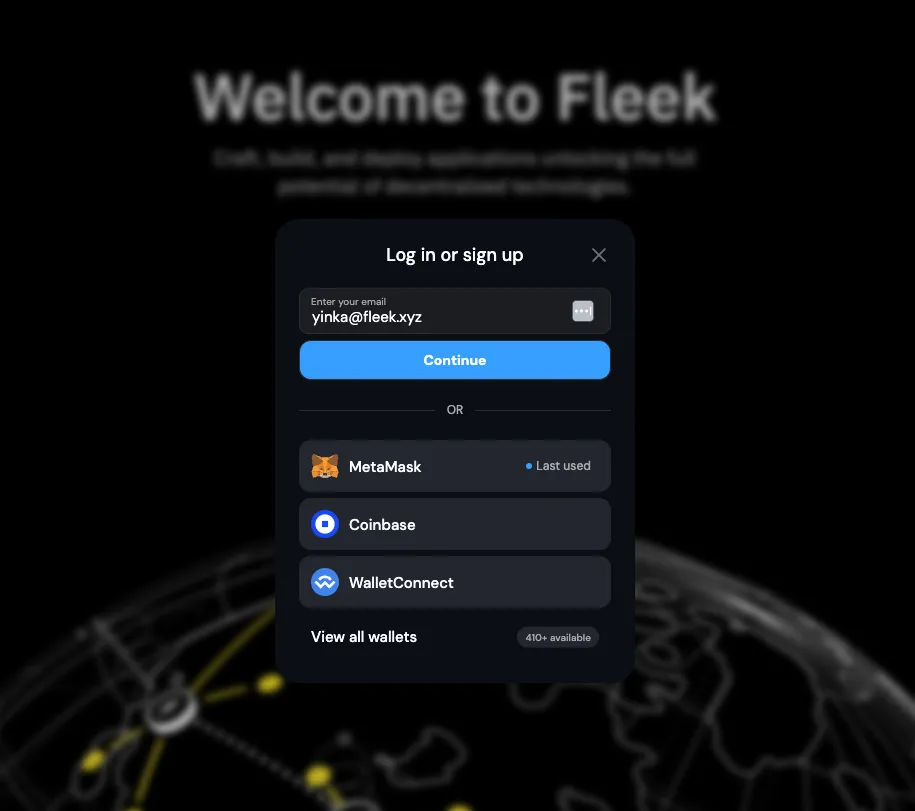
You’ll be prompted to create an account with an email address or a wallet.
Insert your email address in the box below, and click on continue.
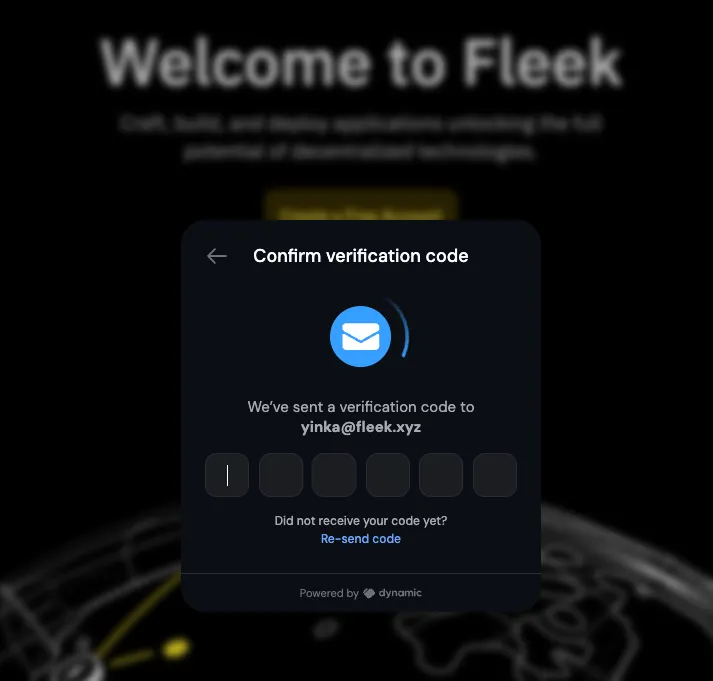
A 6-digit verification code will be sent to your email. Retrieve it and enter the code in the following modal.
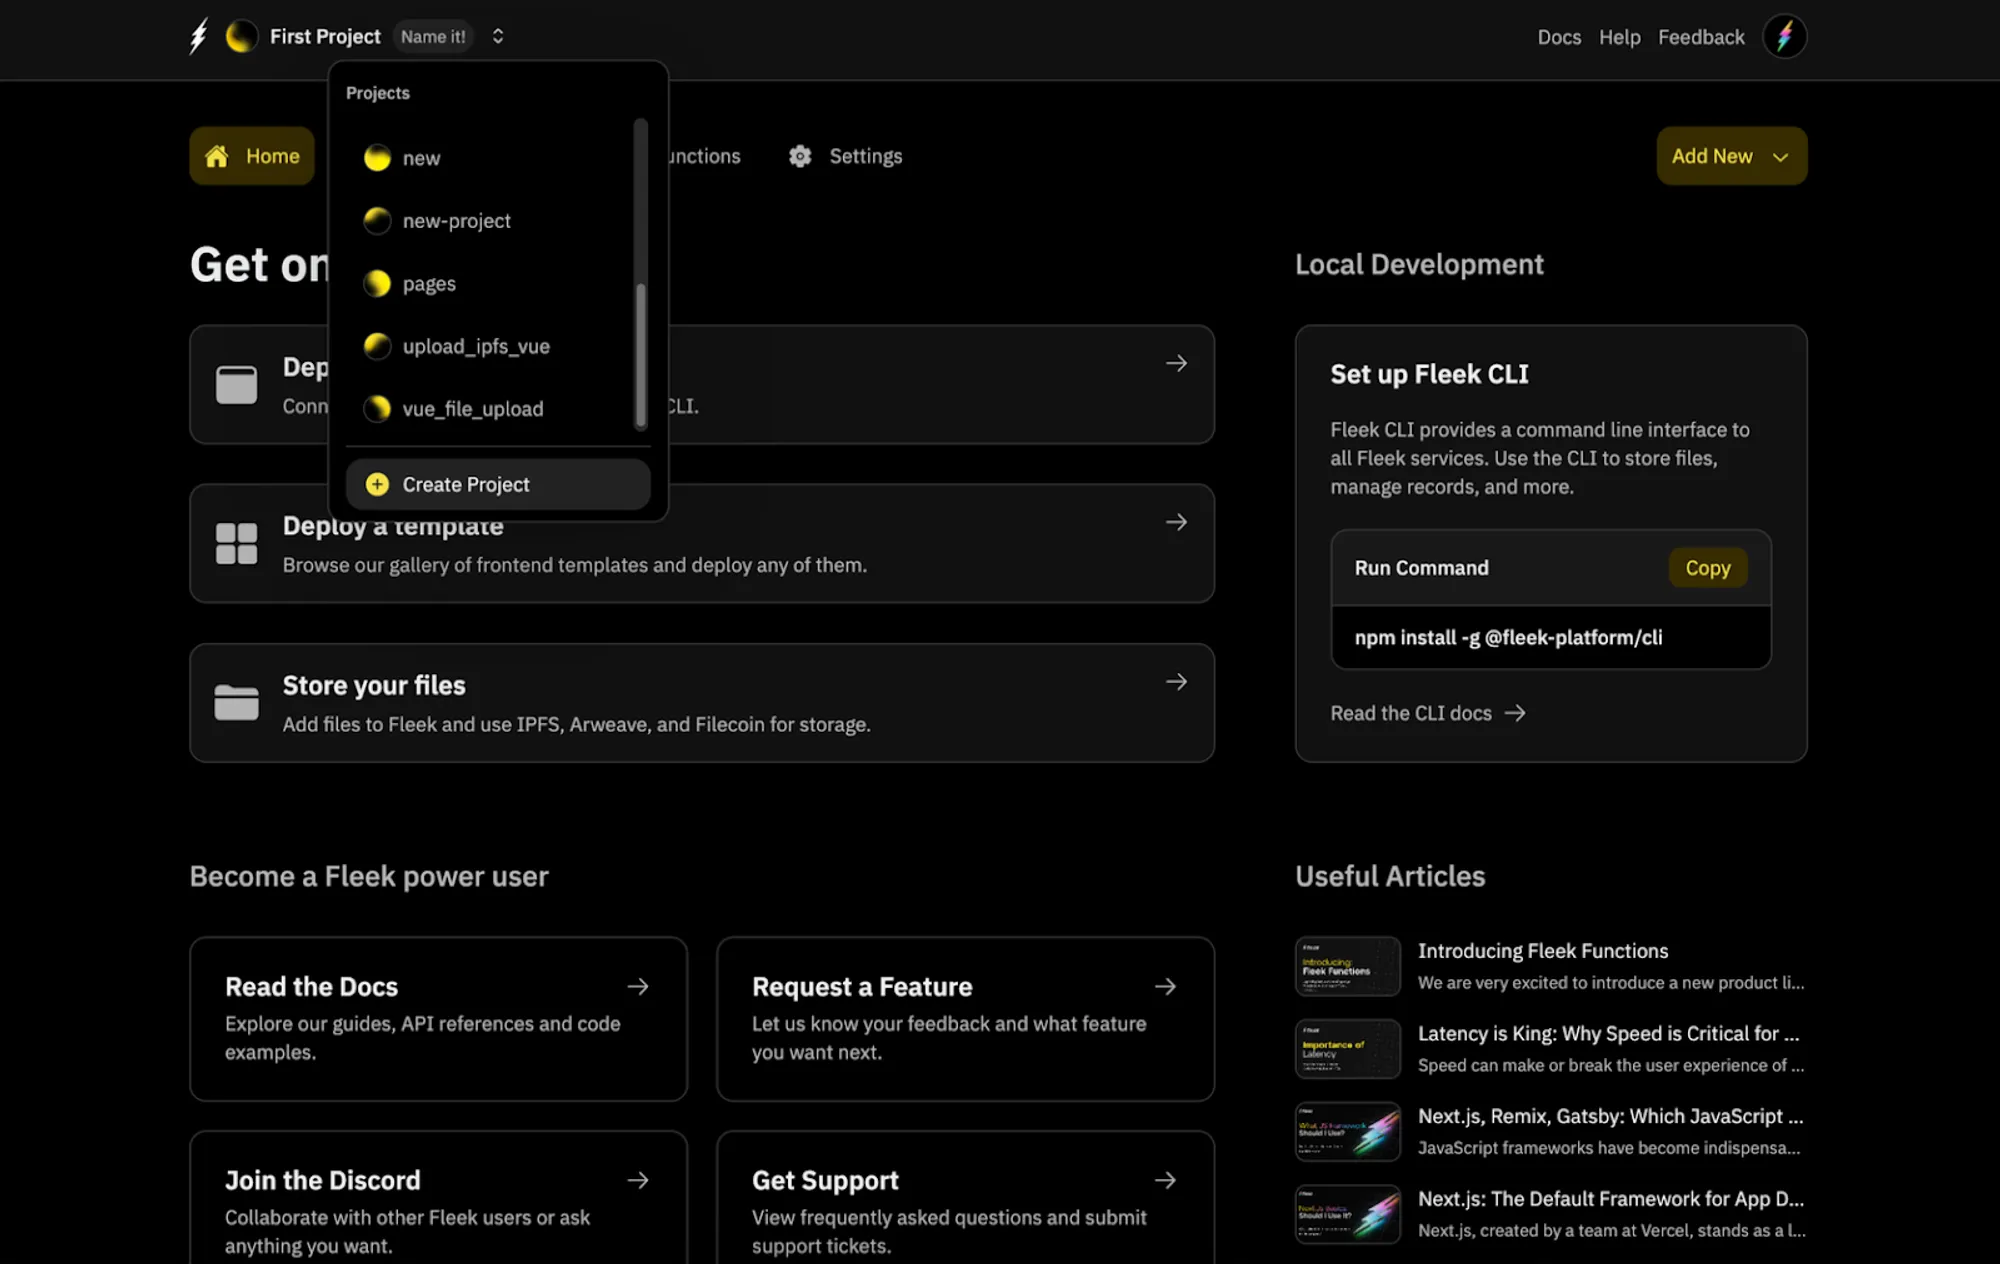
After the code is verified, you’ll be logged in and redirected to the Fleek Dashboard.
GitHub account
You’ll also need to head over to GitHub to create an account.
This is the repository of the react template we’ll be working with and deploying onto Fleek:
https://github.com/fleekxyz/react-template
Simply clone this repo onto your account, and we can move to the next step.
Deploying site on Fleek
Once we have our repo cloned, the next step is the deployment!
Head over to the Fleek dashboard, Create a new project, and give it a name. You’ll be automatically switched to that project.
Click on the Add New button at the top right. Then click on Deploy my site
You’ll be brought to this page:
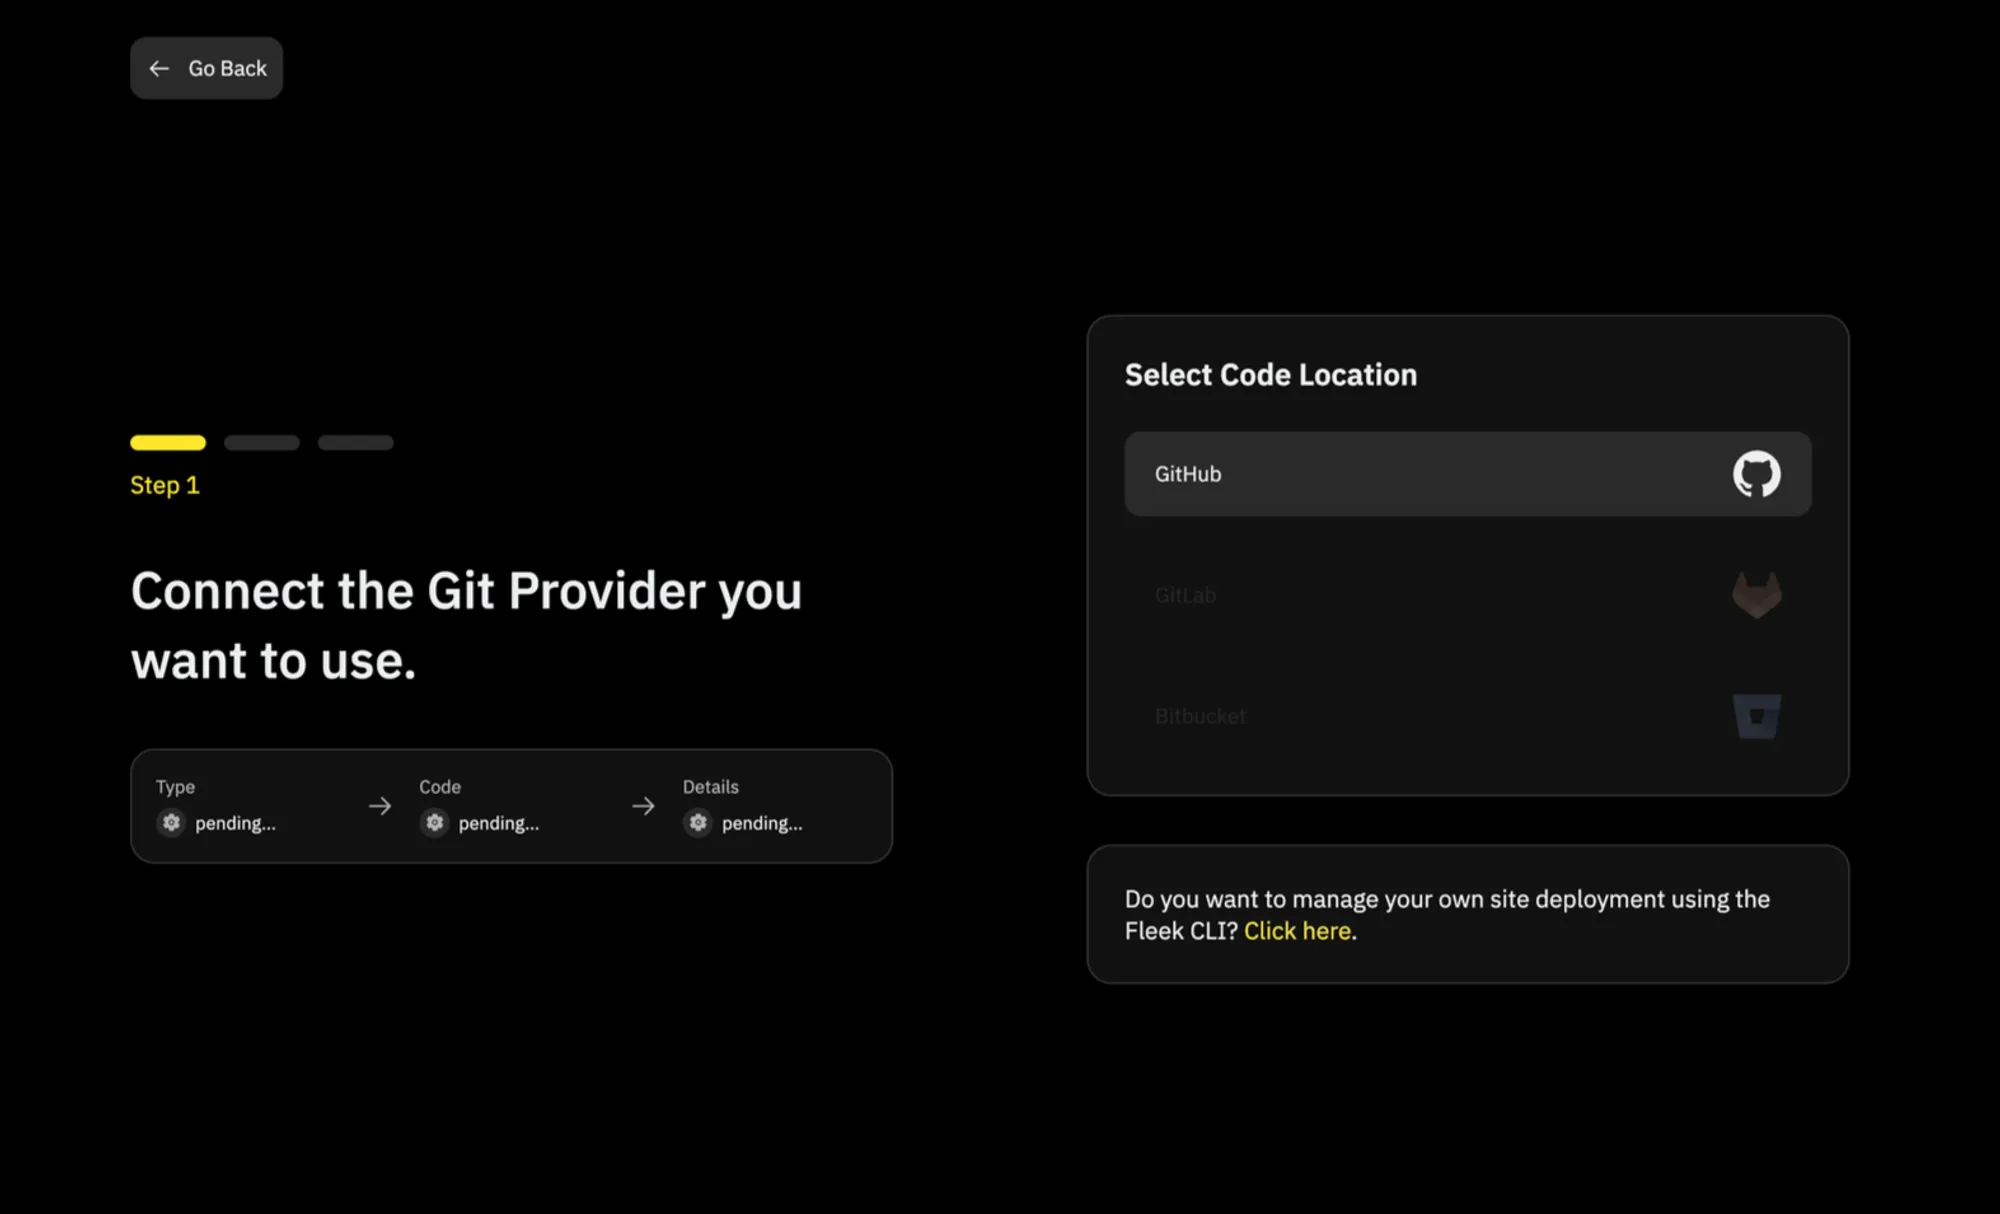
💡 Support for Gitlab and Bitbucket are underway!
Click on the GitHub icon. You’ll see a pop-up like this:
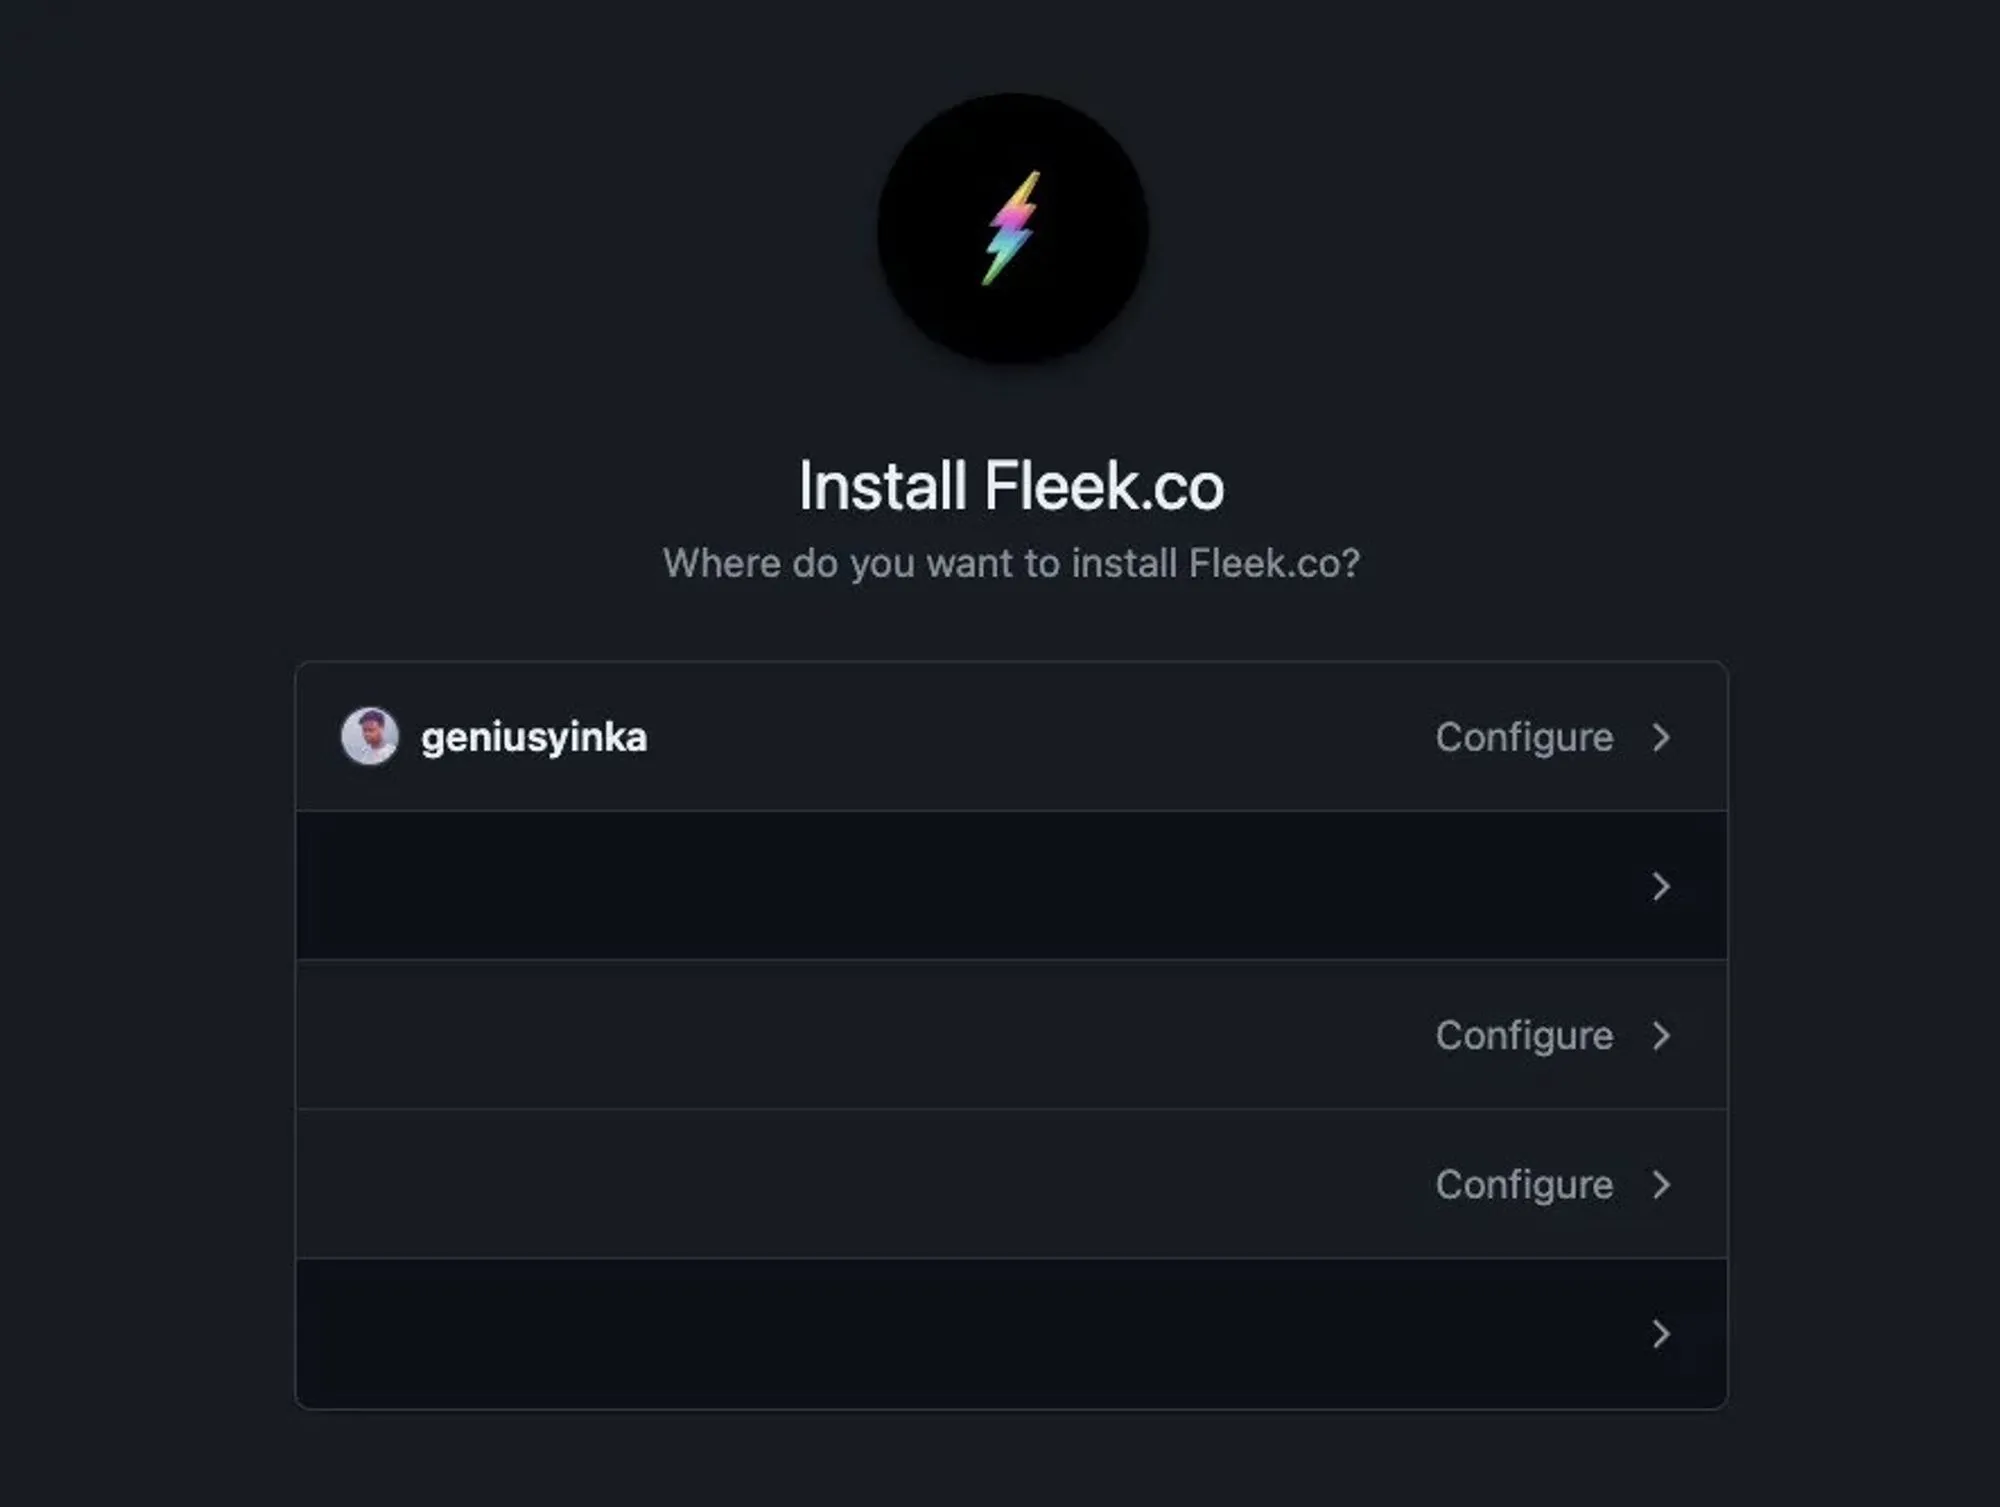
Choose the preferred account or organization. This will lead you to a page where you can grant access to either specific repositories or all repositories.
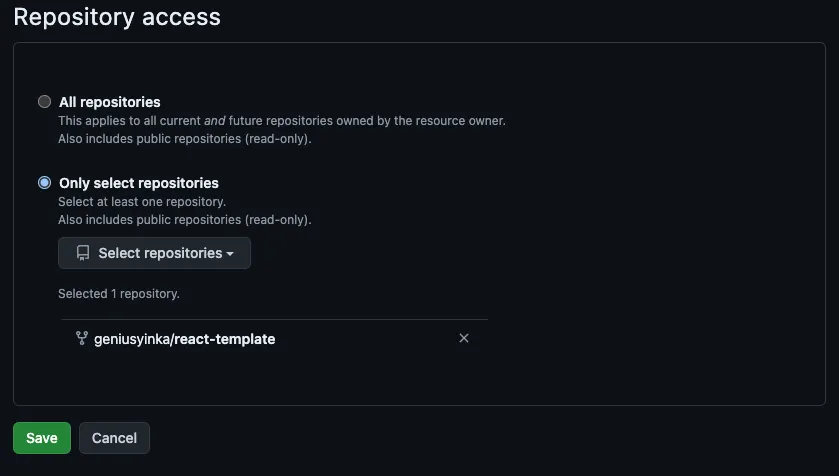
Once you’ve selected the repo(s) you would like to grant Fleek access to, click Save. You should see this— the image below shows a list of repos Fleek has access to.
💡 To grant Fleek access to a different repository, simply click on the ‘Adjust GitHub App Permission’ button below.
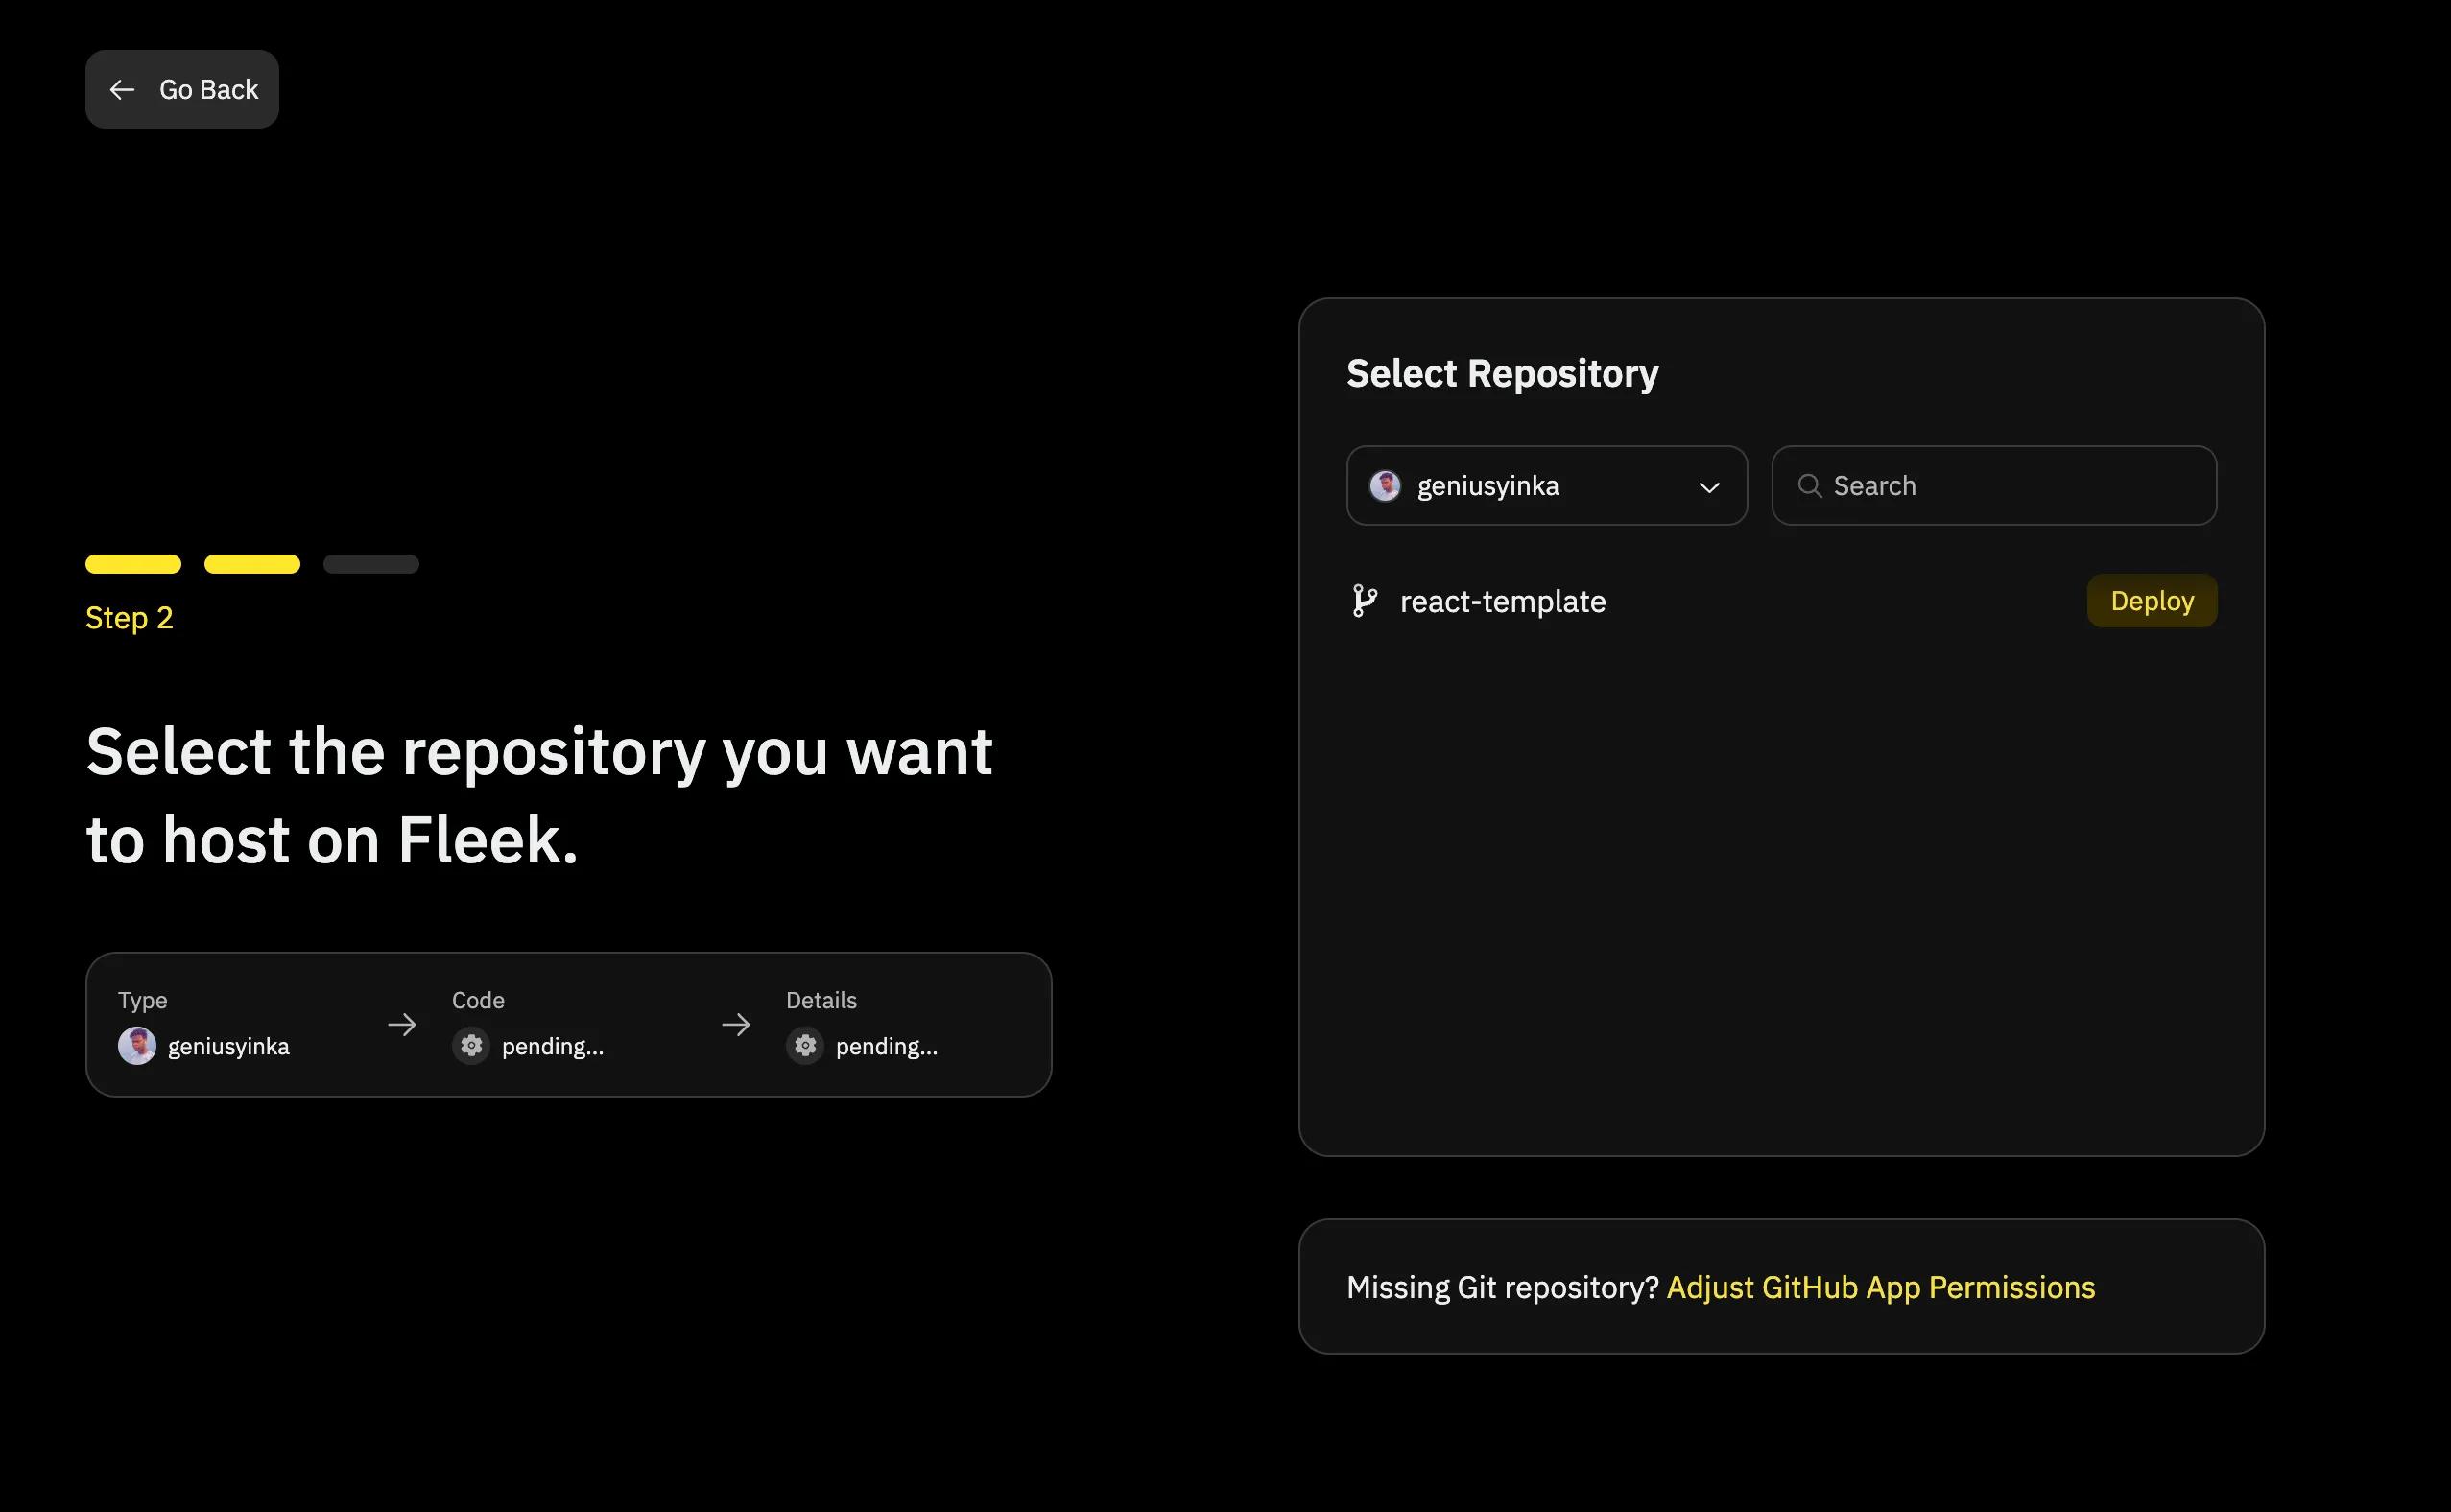
The next step will be to click on the Deploy button of the repository you would like to deploy to Fleek.
You’ll then be brought to this page:
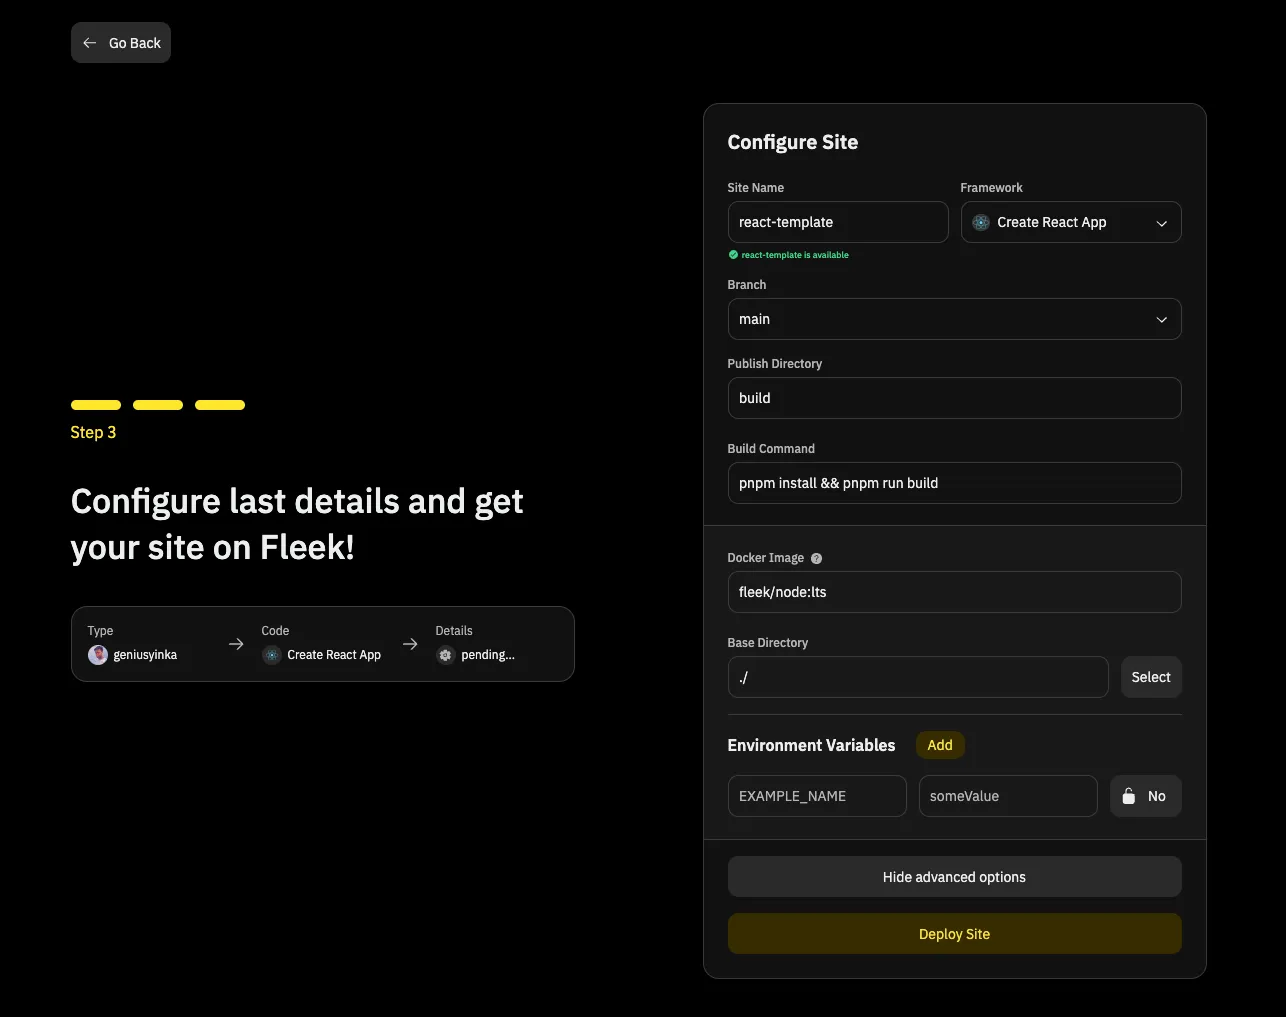
A few things to note about this page.
- You can modify the
Site Nameto anything you want. - The framework is automatically detected by Fleek.
- The
mainbranch is automatically selected. If you’d like to deploy code from a different branch, feel free to select that branch. - The
Publish Directoryis also automatically determined by Fleek based on the Default publish directory by the framework. If you’ve made any modifications, change the name to reflect this. - The
Build Commandis also automatically determined by Fleek. If this is different from yours, modifications can be made.
Advanced options
When you click on the Show Advanced Options
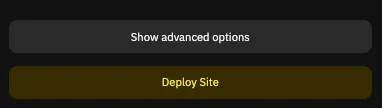
You can make modifications to things like:
- Docker Image & Tag
- The Base Directory
- The Environmental Variables
Once you are satisfied with the modifications you’ve made, simply click on the Deploy Site button to allow Fleek to begin the deployment process.
You will be automatically redirected to this page on the Fleek dashboard:
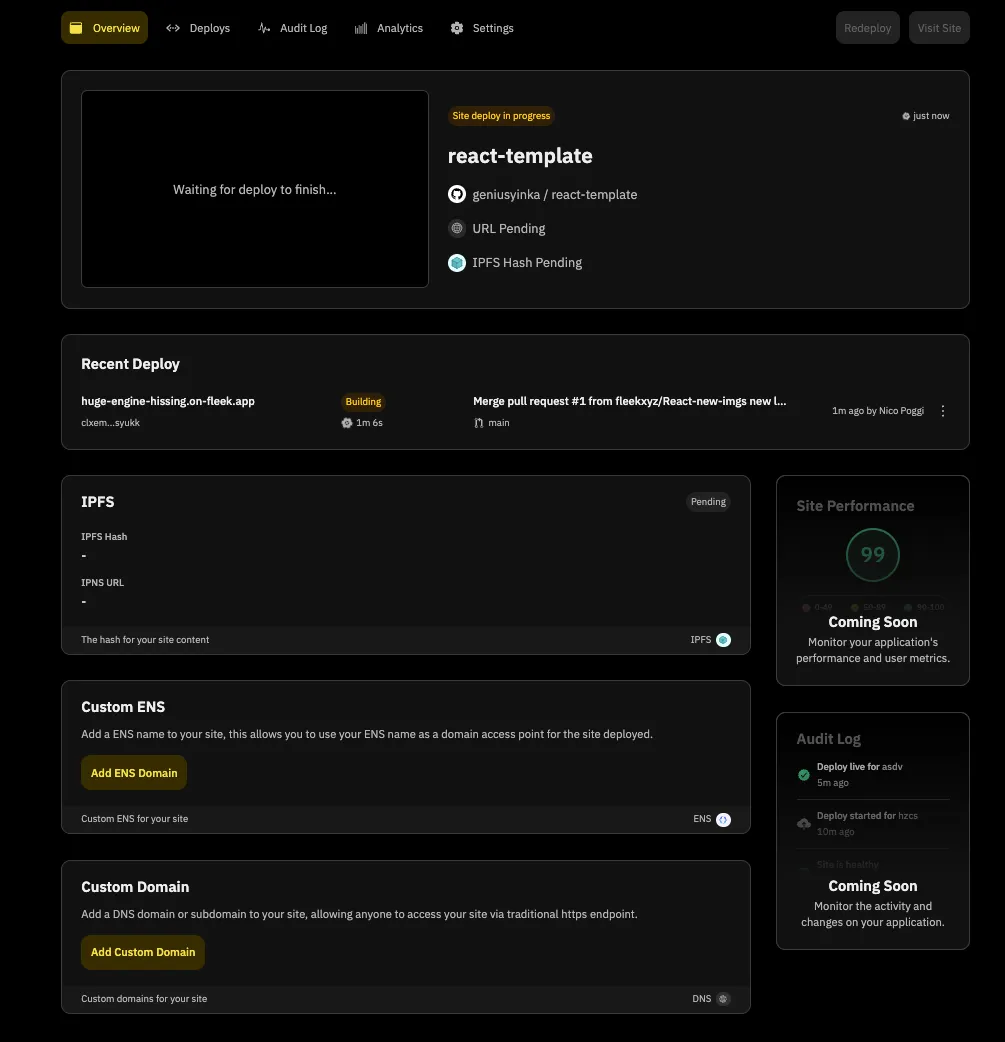
The Overview page shows you the status of your site deployment, you can also monitor the status of your deployment by clicking on the Deploys tab. The Audit Log , Analytics, Settings, have helpful information about your deployment as well.
Once your site has been successfully deployed, you should see a Site is live notification and your site’s URL.

Click on the URL (For this example it’s https://wailing-action-mammoth.on-fleek.app/ but yours will be different) and it’ll take you to your fully functional React App!
Congratulations! You’ve successfully deployed your React app onto Fleek!