Fleek AI Agents API: Step-by-step guide

Introduction
This guide provides step-by-step instructions on how to use the Fleek AI Agents API. It covers all available requests, authentication methods, and practical examples to help users interact with the API, even if they are new to it.
Authentication
To use the API, you need an X-Api-Key. Follow these steps to retrieve it:
1. Generate Your X-Api-Key
To get an API key:
-
Go to the fleek.xyz/agents page. Click on the “Account settings” button at the bottom of the page.
-
The “API tokens” tab lists all your managed API keys.

- To get an API key from the Eliza deployment page, click on the “Create API token” button.
- Type the name of the API key you want to create and press the “Create API token” button.
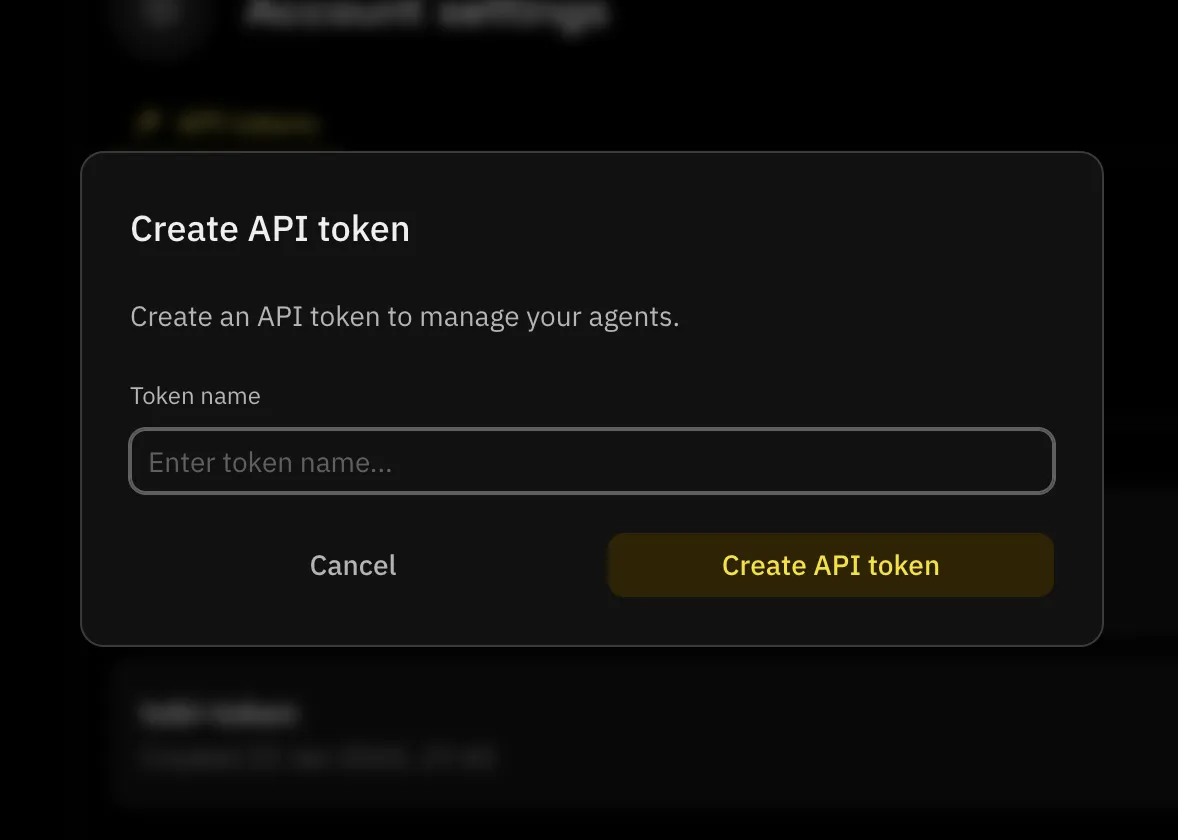
Use the token field as your X-Api-Key for all API requests.
Agents API Requests
1. List All AI Agents
This request retrieves all AI agents associated with your Fleek account.
Request: GET /api/v1/ai-agents
Example:
curl 'https://api.fleek.xyz/api/v1/ai-agents?size=10' \

--header 'X-Api-Key: YOUR_SECRET_TOKEN'
Response example:
{
  "data": [
    {
      "id": "agent_id",

      "projectId": "project_id",

      "name": "AgentName",

      "avatar": null,

      "status": "Created",

      "character_file": "{...}",

      "host": "server_ip",

      "slotNumber": "user_specific_slot_number",

      "createdBy": "user_id",

      "createdAt": "user_specific_created_timestamp",

      "updatedAt": "user_specific_updated_timestamp",

      "deletedAt": null
    }
  ],

  "next_page": null,

  "prev_page": null
}
- Replace your_x_api_key with your API key
2. Create an AI Agent draft
This request allows you to create a new AI agent draft on Fleek, to upload it later.
Request: POST /api/v2/ai-agents
Example:
curl https://api.fleek.xyz/api/v2/ai-agents \

--request POST \

--header 'Content-Type: application/json' \

--header 'X-Api-Key: YOUR_SECRET_TOKEN' \

--data '{

"avatar": "dGVzdGltYWdlZGF0YQ==",

"config": "{PUT_YOUR_JSON_CONFIGURATION_HERE_AS_A_STRING}",

"name": "AI_Agent_name",

"projectId": "your_project_id"

}'
Response example:
{
  "id": "your_agent_id",

  "projectId": "your_project_id",

  "name": "Your Agent's Name",

  "avatar": null,

  "status": "Draft",

  "characterFile": "{\"foo\":\"valid Eliza character configuration\"}",

  "createdBy": "your_user_id",

  "createdAt": "",

  "updatedAt": ""
}
- Replace your_x_api_key with your API key
- Replace {PUT_YOUR_JSON_CONFIGURATION_HERE_AS_A_STRING} with your character file json string
- Replace AI_Agent_name with your Agent name
- Replace your_project_id with your project ID
3. Publish a draft AI
This request allows you to publish your AI agent draft on Fleek.
Request: POST /api/v1/ai-agents/{agentId}/publish
Example:
curl 'https://api.fleek.xyz/api/v1/ai-agents/{agentId}/publish' \

--request POST \

--header 'X-Api-Key: your_x_api_key'
Response example:
{
  "avatar": "dGVzdGltYWdlZGF0YQ==",

  "characterFile": "{\"foo\":\"valid Eliza character configuration\"}",

  "createdAt": "",

  "createdBy": "your_user_id",

  "id": "your_agent_id",

  "name": "Your Agent's Name",

  "projectId": "your_project_id",

  "status": "Created",

  "updatedAt": ""
}
- Replace your_x_api_key with your API key
- Replace {agentId} with the ID of the agent you want to publish the draft.
4. Get an AI Agent
This request fetches details of a specific AI agent using its ID.
Request: GET /api/v1/ai-agents/{agent_id}
Example:
curl 'https://api.fleek.xyz/api/v1/ai-agents/{agentId}' \

--header 'X-Api-Key: your_x_api_key'
Response example:
{
  "id": "agent_id",

  "projectId": "your_project_id",

  "name": "AgentName",

  "avatar": null,

  "status": "Created",

  "character_file": "{...}",

  "host": "server_ip",

  "slotNumber": "user_specific_slot_number",

  "createdBy": "user_id",

  "createdAt": "user_specific_created_timestamp",

  "updatedAt": "user_specific_updated_timestamp",

  "deletedAt": null
}
- Replace your_x_api_key with your API key
- Replace {agentId} with your actual agent ID.
5. Update an AI Agent
Use this request to modify the name or character file of an AI agent.
Request: PUT /api/v1/ai-agents/{agent_id}
Example:
curl 'https://api.fleek.xyz/api/v1/ai-agents/{agentId}' \

--request PUT \

--header 'Content-Type: application/json' \

--header 'X-Api-Key: your_x_api_key' \

--data '{

"avatar": "dGVzdGltYWdlZGF0YQ==",

"characterFile": "{UPDATED_JSON_CONFIGURATION_AS_STRING}",

"name": "UpdatedAgentName"

}'
Response example:
{
  "id": "new_agent_id",

  "projectId": "your_project_id",

  "name": "UpdatedAgentName",

  "avatar": null,

  "status": "Created",

  "character_file": "{...}",

  "host": "server_ip",

  "slotNumber": "user_specific_slot_number",

  "createdBy": "user_id",

  "createdAt": "user_specific_created_timestamp",

  "updatedAt": "user_specific_updated_timestamp",

  "deletedAt": null
}
- Replace {agentId} with your actual agent ID.
- Replace your_x_api_key with your API key
- Replace {UPDATED_JSON_CONFIGURATION_AS_STRING} with your character file json string
- Replace UpdatedAgentName with your new Agent name
6. Delete an AI Agent
This request removes an AI agent from your Fleek account.
Request: DELETE /api/v1/ai-agents/{agent_id}
Example:
curl 'https://api.fleek.xyz/api/v1/ai-agents/{agentId}' \

--request DELETE \

--header 'X-Api-Key: your_x_api_key'
Response example:
{
  "message": "AI Agent deleted successfully"
}
- Replace {agentId} with your actual agent ID.
- Replace your_x_api_key with your API key
7. Get the logs from an AI agent
To retrieve the logs of an AI agent, use the following request:
Request: GET /api/v1/ai-agents/{agentId}/logs
Example:
curl 'https://api.fleek.xyz/api/v1/ai-agents/{agentId}/logs' \

--header 'X-Api-Key: your_x_api_key'
Response example:
{
  "data": [
    {
      "id": "s=a6542de1ed8c4c5c98a9080c5dc1e96d;i=17673;b=5956ed0f842c4e01a08da7328fc9a960;m=13a9e975565;t=62e066a5c73c6;x=fb2de8833a54362e",

      "timestamp": 1739454949,

      "message": "  TestforFleek123456 ",

      "priority": 6
    }
  ],

  "next_page": "https://api.fleek.xyz/api/v1/ai-agents/{agentId}/logs?cursor=...",

  "prev_page": null
}
- Replace {agentId} with your actual agent ID.
- Replace your_x_api_key with your API key.
- Logs contain id, timestamp, message, and priority levels.
8. Get the Status of an AI Agent
This request retrieves the status of an AI agent.
Request: GET /api/v1/ai-agents/{agentId}/status
Example:
curl 'https://api.fleek.xyz/api/v1/ai-agents/{agentId}/status' \

--header 'X-Api-Key: your_x_api_key'
Response example:
{
  "status": "true"
}
- Replace {agentId} with your actual agent ID.
- Replace your_x_api_key with your API key.
9. Start an AI agent
To start an AI agent, use the following request:
Request: POST /api/v1/ai-agents/{agentId}/start
Example:
curl 'https://api.fleek.xyz/api/v1/ai-agents/{agentId}/start' \

--request POST \

--header 'X-Api-Key: your_x_api_key'

- Replace {agentId} with your actual agent ID.
- Replace your_x_api_key with your API key.
10. Stop an AI agent
To stop an AI agent, use the following request:
Request: POST /api/v1/ai-agents/{agentId}/stop
Example:
curl 'https://api.fleek.xyz/api/v1/ai-agents/{agentId}/stop' \

--request POST \

--header 'X-Api-Key: your_x_api_key'

- Replace {agentId} with your actual agent ID.
- Replace your_x_api_key with your API key.
11. Get the attestation bytes for an AI agent
This endpoint is used to get the attestation bytes for an AI agent.
Request: GET api/v1/ai-agents/{agentId}/attestation
Example:
curl 'https://api.fleek.xyz/api/v1/ai-agents/{agentId}/attestation' \

--header 'X-Api-Key: your_x_api_key'

- Replace {agentId} with your actual agent ID.
- Replace your_x_api_key with your API key.
12. Proxy requests to the AI agent’s API
This endpoint is used to proxy requests to the AI agent API. Any method is supported (GET, POST, PUT, DELETE, etc.). It will forward the request to the AI agent API and return the response.
Request: GET /api/v1/ai-agents/{agentId}/api/{*key}
Example:
curl 'https://api.fleek.xyz/api/v1/ai-agents/{agentId}/api/{*key}' \

--header 'X-Api-Key: your_x_api_key'

- Replace {agentId} with your actual agent ID.
- Replace your_x_api_key with your API key.
Subscriptions API Requests
1. Get All Available Plans
This request retrieves all available subscription plans. It is needed for the subscription flow.
Request: GET /api/v1/plans
Example:
curl 'https://api.fleek.xyz/api/v1/plans' \

--header 'X-Api-Key: your_x_api_key'
Response example:
{
  "id": "prod_RXPrGVnrVm8Dbg",
  "name": "AI Agent",
  "description": null,
  "price": 2000,
  "createdAt": "2025-01-06T18:27:40Z",
  "updatedAt": "2025-01-06T18:27:59Z",
  "metadata": {
    "app": "fleek-platform"
  }
},
- Replace your_x_api_key with your API key
2. List All Subscriptions
This request retrieves all subscriptions associated with a specific project.
Request: GET /api/v1/subscriptions?projectId={projectId}
Example:
curl 'https://api.fleek.xyz/api/v1/subscriptions?projectId={projectId}' \

--header 'X-Api-Key: your_x_api_key'
Response example:
{
  "endDate": "2025-03-02T00:00:00",
  "id": "sub_9WgRMUCEFZDhHTzLISMgFEwp",
  "items": [
    {
      "id": null,
      "priceId": "…",
      "productId": "…",
      "quantity": 1,
      "unitAmount": null,
      "usageType": "PerUnit"
    }
  ],
  "periodEndDate": "2025-02-02T00:00:00",
  "periodStartDate": "2025-01-02T00:00:00",
  "productId": "prod_fas25qQLqfQrsN",
  "scheduleId": null,
  "startDate": "2025-01-02T00:00:00",
  "status": "Active"
}
- Replace your_x_api_key with your API key
- Replace {projectId} with your actual project ID
3. List Payment Methods
This request returns a paginated list of saved payment methods for a given project.
Request: GET /api/v1/payment-methods?projectId={projectId}
Example:
curl 'https://api.fleek.xyz/api/v1/payment-methods?projectId={projectId}' \

--header 'X-Api-Key: your_x_api_key'
Response example:
{
  "data": [
    {
      "brand": "visa",
      "country": "US",
      "expiryMonth": "9",
      "expiryYear": "2034",
      "id": "pm_IxuwEtErgYZejkQl",
      "last4": "4014"
    }
  ],
  "next": "next_cursor",
  "prev": "prev_cursor"
}
- Replace your_x_api_key with your API key
- Replace {projectId} with your actual project ID
4. Create Payment Portal Session
This endpoint initiates a session for managing payment methods.
Users can use this session to add or update payment methods for a project.
Request: PUT /api/v1/payment-methods/manage
Example:
curl https://api.fleek.xyz/api/v1/payment-methods/manage \
  --request PUT \
  --header 'Content-Type: application/json' \
  --header 'X-Api-Key: your_x_api_key' \
  --data '{
    "projectId": "your_project_id"
  }'
Response example:
{
  "url": "https://checkout.stripe.com/c/test_a1b2C3d4E5f6G7h8I9j0KlmNopQr"
}
- Replace your_x_api_key with your API key
- Replace your_project_id with your Project ID
5. Create a Subscription
This endpoint creates a new subscription for a specified product.
To use this request, the project must have a payment method set up. It requires:
projectId (your project’s ID)
product.id (the ID of the product you want to subscribe to)
quantity (number of units for the subscription)
Request: POST /api/v1/subscriptions
Example:
curl https://api.fleek.xyz/api/v1/subscriptions \
  --request POST \
  --header 'Content-Type: application/json' \
  --header 'X-Api-Key: your_x_api_key' \
  --data '{
    "metadata": null,
    "planId": null,
    "product": {
      "id": "product_id",
      "quantity": 2
    },
    "projectId": "your_project_id"
  }'
Response example:
{
  "endDate": "2025-03-02T00:00:00",
  "id": "sub_9WgRMUCEFZDhHTzLISMgFEwp",
  "items": [
    {
      "id": null,
      "priceId": "…",
      "productId": "…",
      "quantity": 1,
      "unitAmount": null,
      "usageType": "PerUnit"
    }
  ],
  "periodEndDate": "2025-02-02T00:00:00",
  "periodStartDate": "2025-01-02T00:00:00",
  "productId": "prod_fas25qQLqfQrsN",
  "scheduleId": null,
  "startDate": "2025-01-02T00:00:00",
  "status": "Active"
}
- Replace your_x_api_key with your API key
- Replace your_project_id with your Project ID
- Replace product_id with the correct product ID.
6. Update Subscription Quantity
This endpoint allows modifying the quantity of an existing subscription by applying a relative adjustment.
Use updateBy to increase or decrease the quantity.
Request: POST /api/v1/subscriptions/{subscription_id}/quantity
Example:
curl 'https://api.fleek.xyz/api/v1/subscriptions/{subscription_id}/quantity' \
  --request POST \
  --header 'Content-Type: application/json' \
  --header 'X-Api-Key: your_x_api_key' \
  --data '{
    "projectId": "your_project_id",
    "updateBy": 1
  }'
Response example:
{
  "endDate": "2025-03-02T00:00:00",
  "id": "sub_9WgRMUCEFZDhHTzLISMgFEwp",
  "items": [
    {
      "id": null,
      "priceId": "…",
      "productId": "…",
      "quantity": 1,
      "unitAmount": null,
      "usageType": "PerUnit"
    }
  ],
  "periodEndDate": "2025-02-02T00:00:00",
  "periodStartDate": "2025-01-02T00:00:00",
  "productId": "prod_fas25qQLqfQrsN",
  "scheduleId": null,
  "startDate": "2025-01-02T00:00:00",
  "status": "Active"
}
- Replace your_x_api_key with your API key
- Replace your_project_id with your Project ID
- Replace subscription_id with the correct product ID.
7. Cancel a Subscription
This endpoint cancels an active subscription by its subscription_id.
The subscription remains active until the end of the current billing period. After cancellation, it will not renew, but the user can continue using it until expiration.
Request: DELETE /api/v1/subscriptions/{subscription_id}
Example:
curl 'https://api.fleek.xyz/api/v1/subscriptions/{subscription_id}' \
  --request DELETE \
  --header 'X-Api-Key: your_x_api_key'
Response example:
{
  "endDate": "2025-03-02T00:00:00",
  "id": "sub_9WgRMUCEFZDhHTzLISMgFEwp",
  "items": [
    {
      "id": null,
      "priceId": "…",
      "productId": "…",
      "quantity": 1,
      "unitAmount": null,
      "usageType": "PerUnit"
    }
  ],
  "periodEndDate": "2025-02-02T00:00:00",
  "periodStartDate": "2025-01-02T00:00:00",
  "productId": "prod_fas25qQLqfQrsN",
  "scheduleId": null,
  "startDate": "2025-01-02T00:00:00",
  "status": "Active"
}
- Replace your_x_api_key with your API key
- Replace subscription_id with the correct product ID.
Conclusion
This guide provides a comprehensive overview of the Fleek AI Agents API, covering authentication, agent management, logging, status monitoring, and the Subscriptions API Requests. By following the step-by-step instructions, users can seamlessly interact with the API to create, update, and manage AI agents efficiently.
For additional support or further assistance, please visit our Support Center.