How to Deploy AI Agents Using DeepSeek on Fleek
AI-powered agents are becoming an essential tool for automation, customer support, and interactive experiences. With the rise of DeepSeek, developers now have access to a powerful, open-source AI model that enables them to build intelligent applications with ease.
To make AI agent deployment even simpler and provide more optionality, Fleek now integrates DeepSeek, allowing users to spin up and host AI agents effortlessly. With just a few clicks, you can deploy your own AI agent using a pre-made template—no complicated setup required.
In this guide, we’ll walk you through deploying an AI agent to Discord using Fleek, demonstrating how you can have your bot up and running in minutes.
Overview of What We’ll Build
In this guide, we will deploy an AI agent to Discord using Fleek’s agent templates. Instead of dealing with complex server setups or manual configurations, we’ll leverage Fleek’s seamless hosting and DeepSeek’s powerful AI to get everything running quickly.
What This AI Agent Will Do
- It will be able to respond to messages in a Discord server.
- You can customize its personality, making it casual, professional, or anything in between.
- It will run entirely on Fleek, so you won’t need to worry about infrastructure or maintenance.
Why Use Fleek for Deployment?
- Pre-made template → No need to start from scratch.
- Serverless hosting → No manual server management required.
- Fast setup → Deploy in just a few minutes.
Now, let’s get started by obtaining the required API keys.
Step 1: Get Your DeepSeek API Key
Before we can deploy our AI agent, we need to obtain a DeepSeek API key. This key allows our bot to interact with DeepSeek’s AI models and generate responses.
How to Get Your DeepSeek API Key
- Go to the DeepSeek website → https://platform.deepseek.com/api_keys
- Sign up or log in → If you don’t have an account, create one.
- Navigate to the API section → This is usually found in your account settings or dashboard.
- Generate an API key → Click the button to create a new API key.
- Copy and store your key → Keep this key safe, as you’ll need it in the next steps.
💡 Tip: Never share your API key publicly or expose it in your code. Use environment variables or a secure storage method when deploying your agent.

Now that we have the DeepSeek API key, let’s set up the Discord keys to allow our bot to interact with a server.
Step 2: Set Up Discord Keys
Now that we have our DeepSeek API key, the next step is to set up the Discord bot credentials so our AI agent can interact with a Discord server. To do this, we need to generate a Discord Bot Token and an Application ID from the Discord Developer Portal.
How to Get Your Discord Bot Token
- Go to the Discord Developer Portal → https://discord.com/developers/applications
- Click “New Application” → Give your bot a name (e.g., “Dobby”) and create the application.
- Navigate to the “Bot” tab → Click “Add Bot” to turn your application into a bot.
- Copy the Bot Token → Click “Reset Token” and copy the new token (this will be used later).
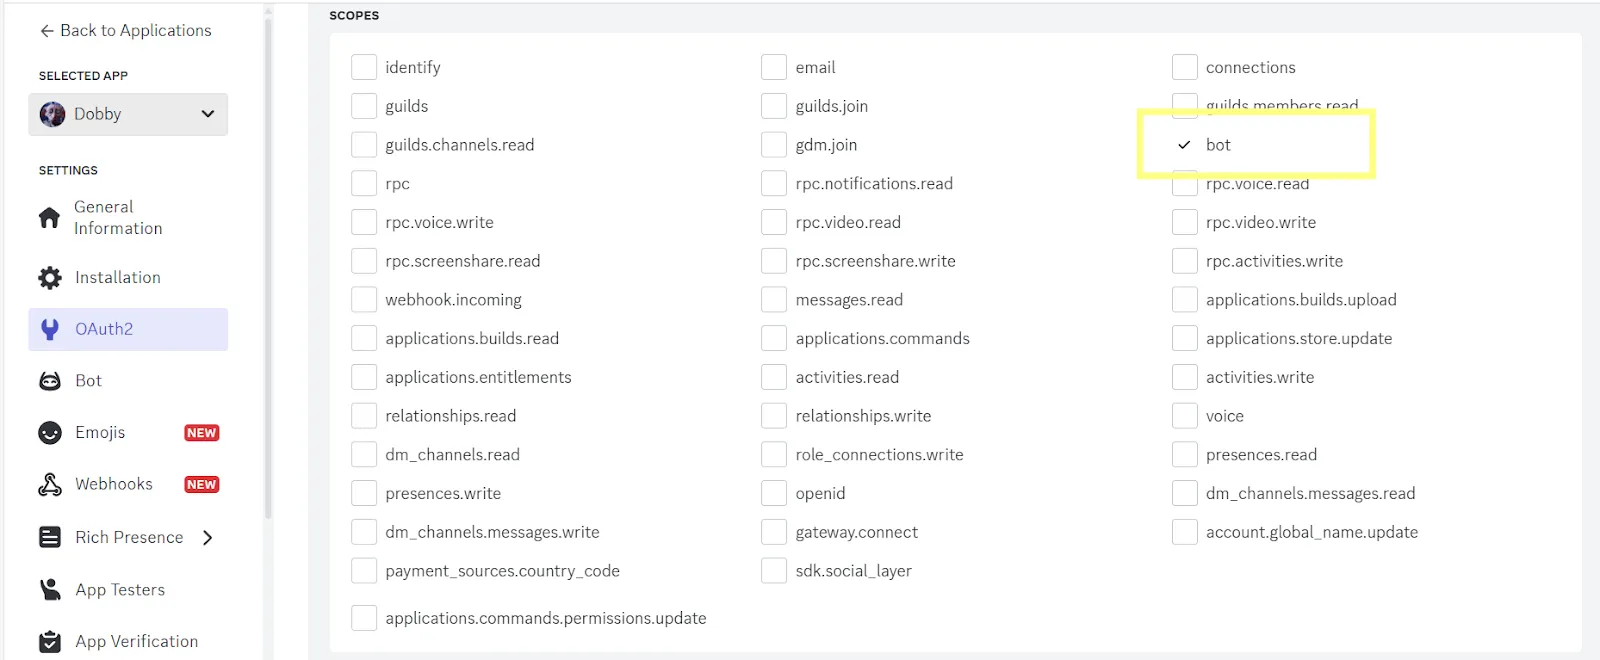
- Enable necessary permissions → In the “OAuth2” → “URL Generator” section, select:
- bot (under OAuth2 scopes)
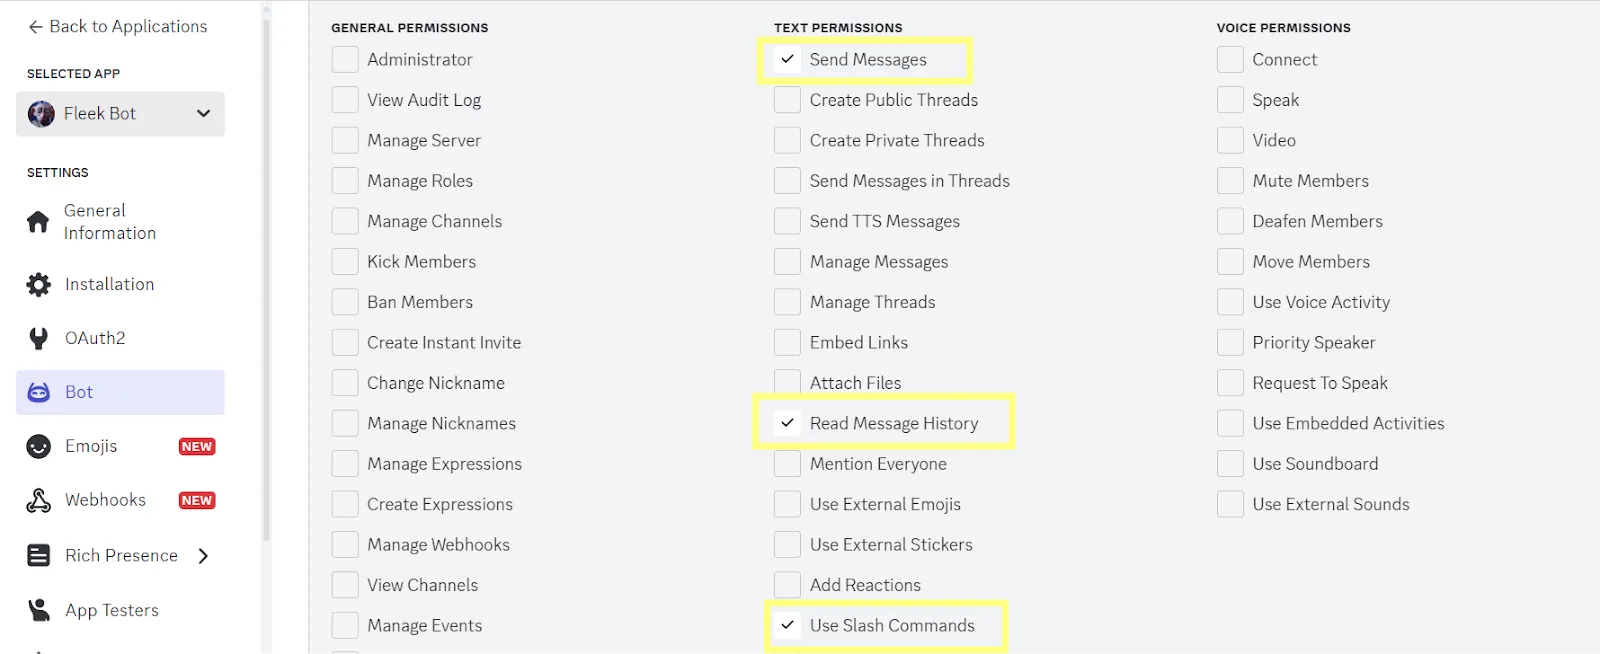
- Permissions like Send Messages, Read Message History, and Use Slash Commands.
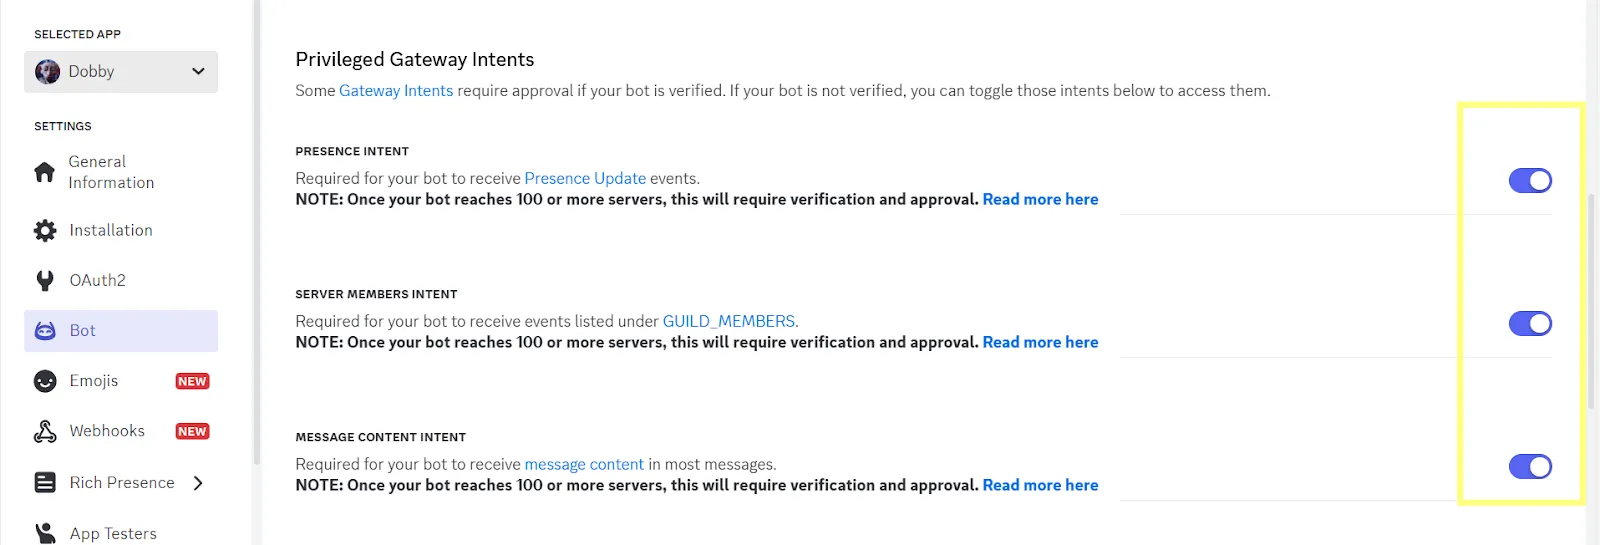
Enable Privileged Gateway Intents
To ensure your bot can function properly, you need to toggle on the following intents in the Bot tab:
- Presence Intent → Required to track presence updates (optional for most bots).
- Server Members Intent → Needed to interact with guild members.
- Message Content Intent → Essential for responding to message content directly.
Make sure all three intents are enabled. These settings allow your bot to perform tasks like reading messages, responding to users, and interacting with server members effectively.
How to Get Your Application ID
- The Application ID can be found on the main page of your app in the Developer Portal.
- Copy and store it safely alongside your Bot Token.
💡 Important: Keep your Bot Token and Application ID private! If your token gets leaked, anyone can control your bot.
Now that we have both DeepSeek and Discord credentials, it’s time to customize our AI agent’s personality before deployment!
Step 3: Customize Your AI Agent’s Personality
Now that we have all the keys ready, it’s time to give your AI agent its unique personality. Head over to fleek.xyz/agents/ and choose the option “Start with a Template.” For this guide, we’ll use the pre-designed Dobby template to create a fun, engaging AI agent.
Customizing Your AI Agent
Fleek’s Eliza platform provides a variety of settings to make your AI agent truly unique. Follow these steps to customize:
- Name: Choose the display name for your AI agent. In this case, the agent will be named Dobby, representing a helpful and quirky personality.
- Model Provider: Toggle the option for DeepSeek, as it will power your AI agent’s responses.
- Clients: Select Discord to deploy your agent to a Discord server.
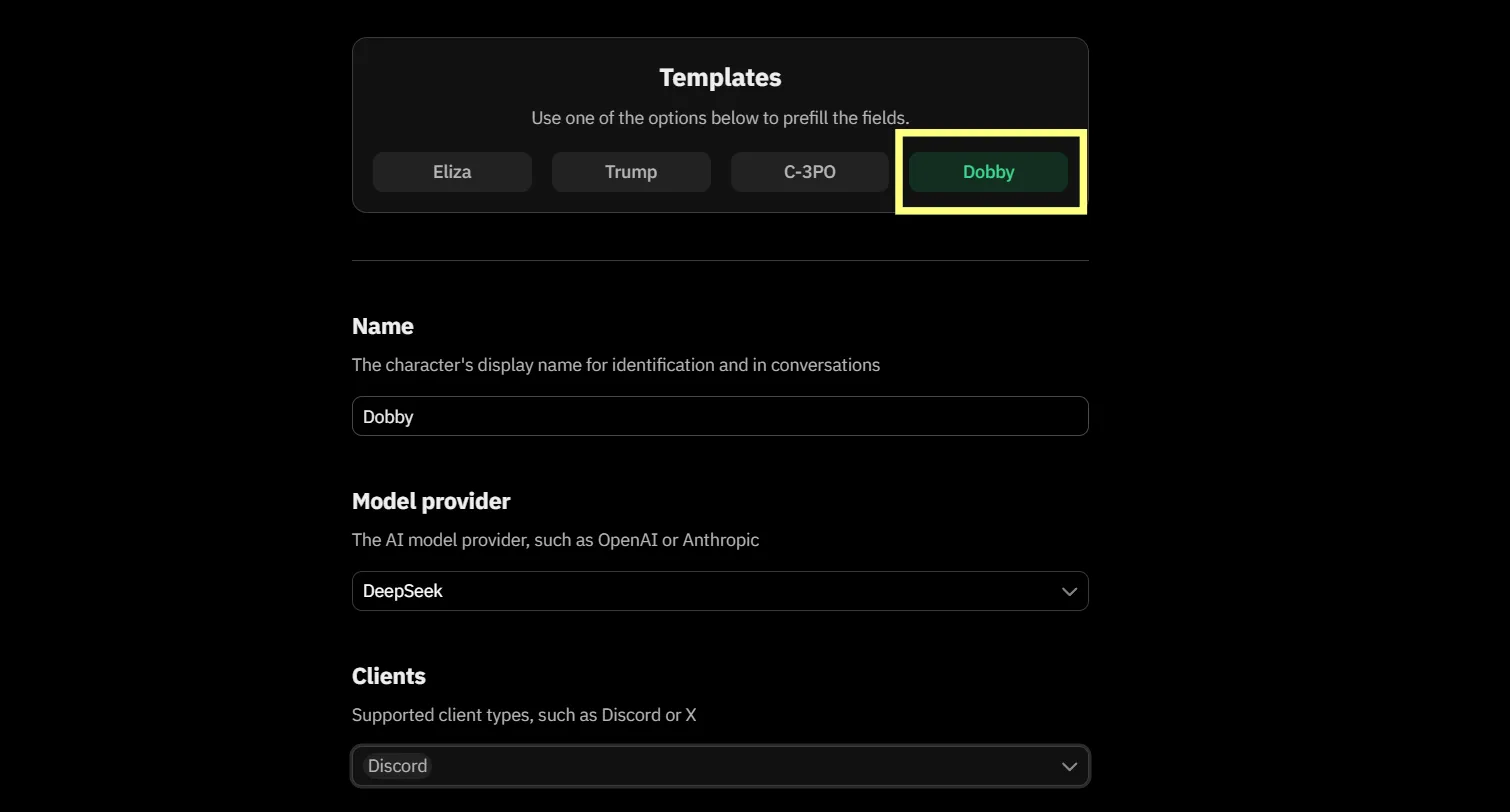
Once you’ve toggled DeepSeek, picked Discord, and made all your customizations, your personalized AI agent will be ready to deploy. For this guide, we’ll stick with the delightful Dobby template, but feel free to explore and make it your own!
Step 4: How to Deploy Your AI Agent
With your customized AI agent ready, it’s time to bring it to life by deploying it on Fleek. The deployment process is simple and involves a few key steps, including reviewing your character and deploying your agent.
How to Deploy Your AI Agent
-
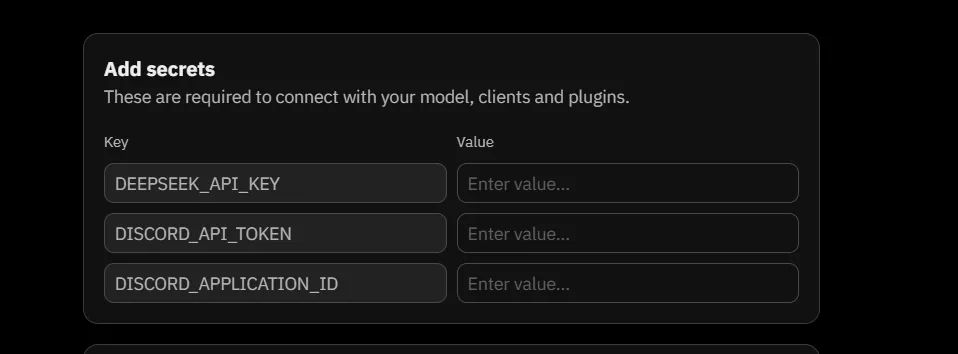
Add Required Secrets
In the “Add Secrets” section, fill in the following keys:
- DEEPSEEK_API_KEY → Paste the API key you obtained from DeepSeek.
- DISCORD_API_TOKEN → Enter the Bot Token you created in the Discord Developer Portal.
- DISCORD_APPLICATION_ID → Add the Application ID from your Discord application.
****Adding an extra set of secrets is optional.
- Review Your Character
- Before deploying, click on “Review Character” to double-check all your customizations.
- Confirm that everything, from the personality traits to the configurations, is set up as desired.
- Deploy Your Agent
- Once you’ve confirmed all settings are correct, click “Deploy Agent.” Fleek will handle the deployment process in just seconds.
![]()
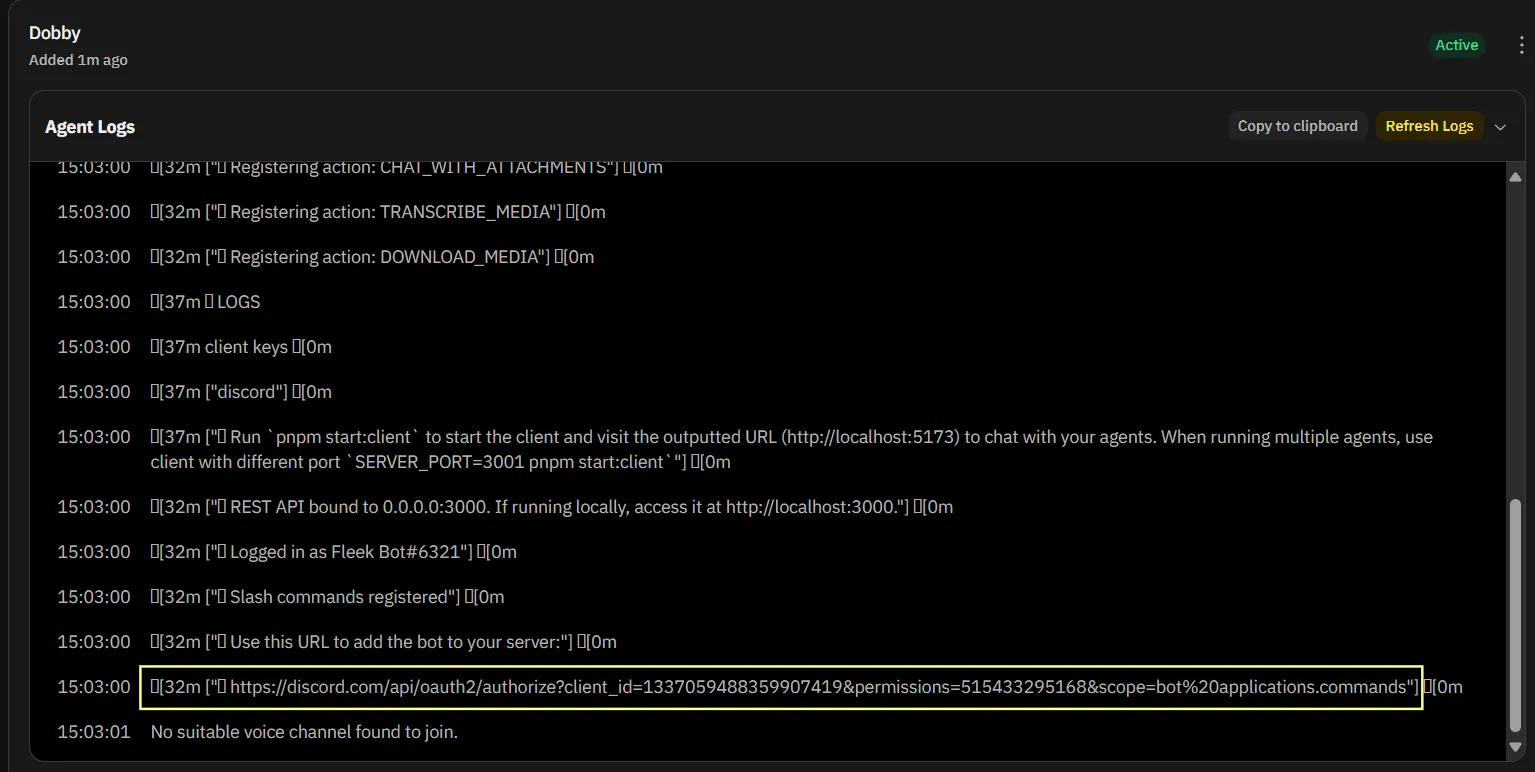
- Visit the Dashboard and Access the Discord URL
- Once your agent is live, navigate to the Dashboard and:
- Click View Logs.
- Refresh the logs to ensure they are up to date.
- Scroll to the very bottom of the logs to find the Discord URL.
- Once your agent is live, navigate to the Dashboard and:
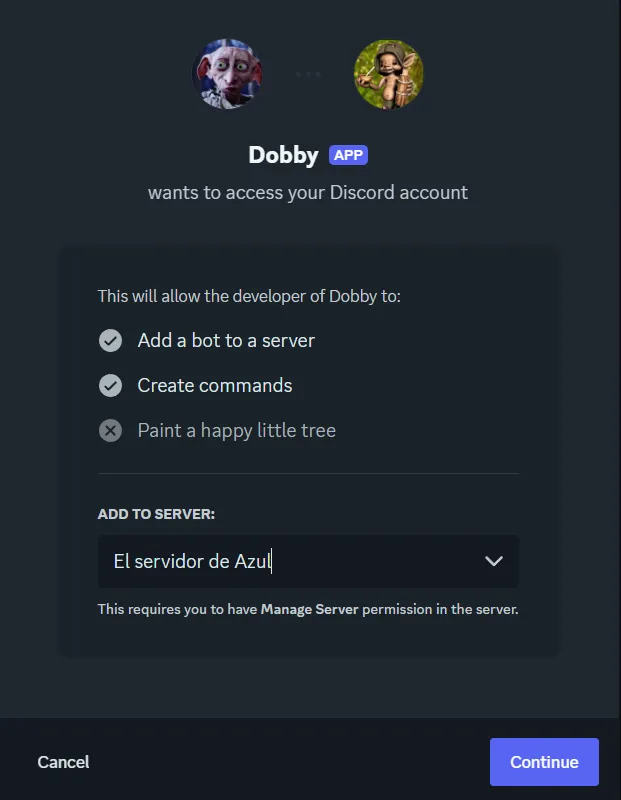
- Invite Your Bot to a Server
- Paste the Discord URL in your browser.
- Open it in your browser and follow the instructions to invite the bot to any server of your preference.
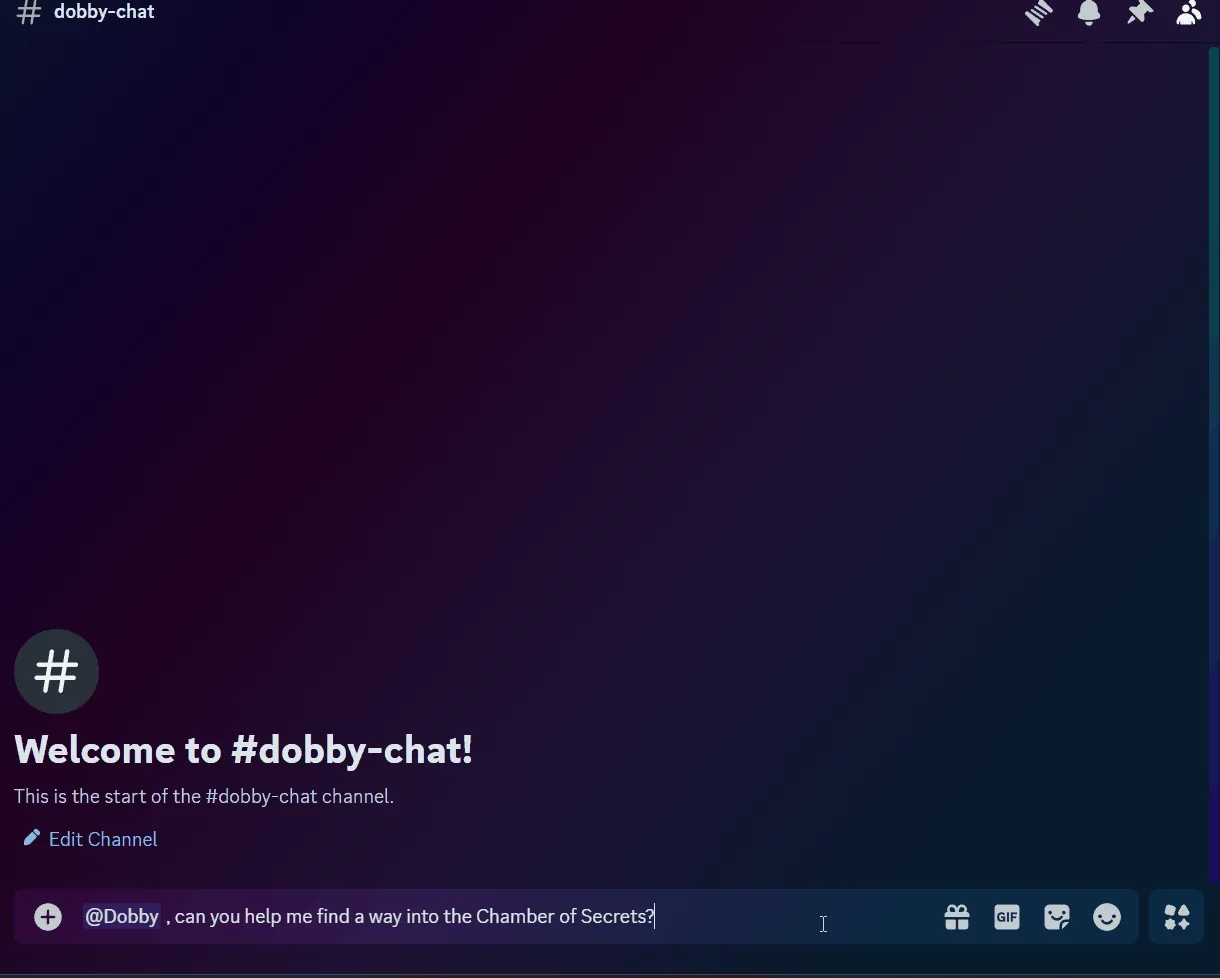
- Start Chatting!
- Once you’ve invited your bot to the server, it’s ready to chat! Send messages to test its responses and watch it come to life.
The 3-Minute Challenge
Now that your AI agent is deployed and chatting, we challenge you to deploy your own AI agent in under 5 minutes.
Here’s how to join the fun:
- Follow the steps outlined in this guide.
- Time yourself to see how quickly you can get your agent live.
- Once your agent is ready, post your results on Twitter and tag Fleek.
We’re excited to see what you create! Ready, set… deploy! 🚀
Resources:
- Docs: https://fleek.xyz/docs/ai-agents/
- Template docs: https://fleek.xyz/docs/ai-agents/select-template/
- DeepSeek API docs:https://api-docs.deepseek.com/