How to Migrate from Cloudflare Web3 to Fleek
With Cloudflare’s recent Web3 product deprecation, many users are looking for alternative platforms to host their decentralized websites and applications. Fleek now has a powerful, user-friendly option that offers a smooth migration process with minimal downtime. This guide will walk you through the necessary steps to migrate from Cloudflare Web3 to Fleek, ensuring a seamless transition.
Step 1: Deploy Your Site on Fleek
Before starting the migration process, you need to set up your site on Fleek. Here’s how:
- Sign up or Log in to Fleek:
- Navigate to Fleek and sign up or log in to your account.
- Create a New Project:
- Click on “Create New Site” and choose your preferred framework (e.g., Next.js, React).
- Follow the prompts to link your GitHub repository, select the branch you want to deploy, and configure the build settings.
- Deploy the Site:
- Click “Deploy” to initiate the build process. Fleek will automatically handle the deployment of your site to IPFS.
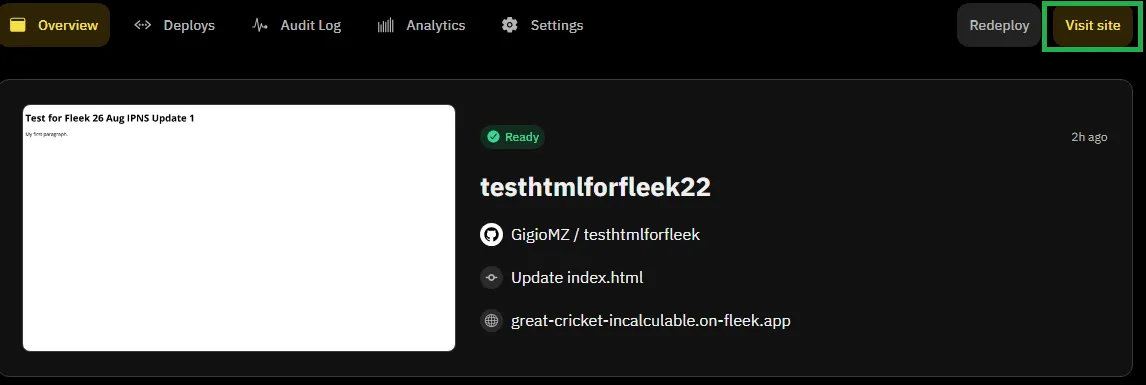
- Verify the Deployment:
- Once deployed, access your site using the provided IPFS link to ensure everything is functioning as expected.
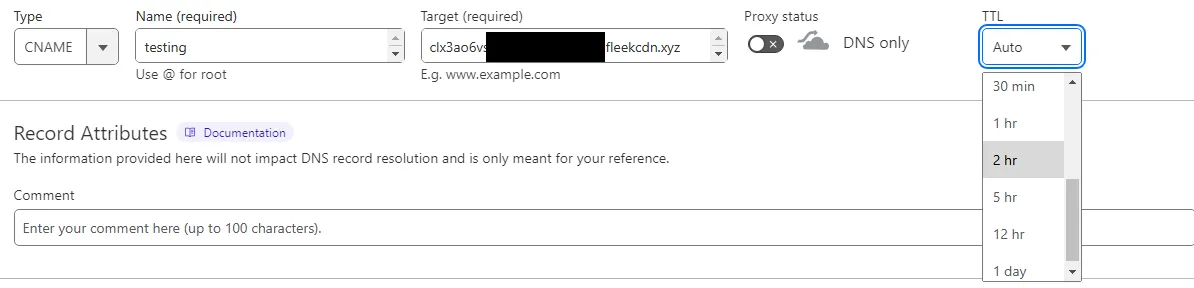
Step 2: Add a New CNAME Record
To prepare for the migration, add a CNAME record on your domain’s DNS that points to Fleek:
- Access Your DNS Settings:
- Go to your domain registrar or DNS provider’s dashboard (e.g., Cloudflare).
- Create a CNAME Record:
- Add a new CNAME record for a subdomain (e.g.,
test.yourdomain.com). - Point this CNAME record to the URL provided by Fleek for your deployed site.
- Add a new CNAME record for a subdomain (e.g.,
- Save the DNS Settings:
- Ensure the settings are saved and that the subdomain is live by visiting the subdomain in your browser.

- Ensure the settings are saved and that the subdomain is live by visiting the subdomain in your browser.
Step 3: Test the Site on Fleek
Before making the final switch, you should test your site to ensure everything is working correctly:
- Visit the Subdomain:
- Open your browser and go to
test.yourdomain.comto see your site hosted on Fleek.
- Open your browser and go to
- Check Functionality:
- Verify that all features, links, and content are functioning as expected.
- Verify that all features, links, and content are functioning as expected.
Step 4: Prepare for Gateway Deletion
You’ll need to delete the Cloudflare Web3 gateway to complete the migration. Here’s how to prepare:
- Set a High TTL:
- In your DNS settings, increase the TTL (Time to Live) for your DNS records. This gives the DNS changes time to propagate smoothly, reducing downtime.
- In your DNS settings, increase the TTL (Time to Live) for your DNS records. This gives the DNS changes time to propagate smoothly, reducing downtime.
- Double-Check the CNAME Setup:
- Ensure that the CNAME record pointing to Fleek is correctly configured and active.
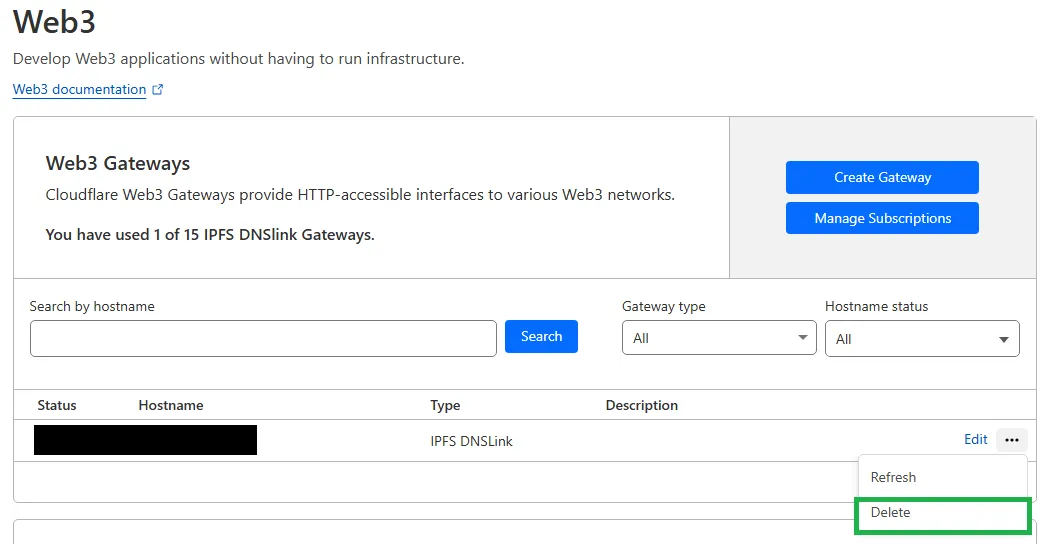
Step 5: Delete the Cloudflare Web3 Gateway
Now that you’ve prepared your DNS settings and tested the Fleek deployment, it’s time to delete the Cloudflare Web3 gateway:
- Delete the Gateway:
- Go to the Cloudflare Web3 dashboard and delete the IPFS gateway. This will remove the DNS records associated with it. \
Step 6: Update the DNS Gateway to Point to Fleek
After deleting the Cloudflare Web3 gateway, you need to update your DNS settings to ensure your main domain (e.g., www.yourdomain.com) now points to your site hosted on Fleek.
- Access Your DNS Settings:
- Return to your domain registrar or DNS provider’s dashboard.
- Update the DNS Record:
- Locate the DNS record for your main domain (e.g.,
www.yourdomain.com). - Point the CNAME record to the URL provided by Fleek for your deployed site.
- Locate the DNS record for your main domain (e.g.,
- Save and Verify:
- Save the updated DNS settings.
- Verify the change by visiting your main domain (
www.yourdomain.com) in a browser. - Ensure that the site loads correctly from Fleek and that all links, resources, and functionalities are working as expected.
- Monitor Propagation:
- DNS changes can take some time to propagate across the internet. Monitor your site to ensure it remains accessible during this transition period.
Conclusion
Migrating from Cloudflare Web3 to Fleek can be a straightforward process if done correctly. By following these steps, you can ensure a smooth transition with minimal downtime, keeping your site or application live and accessible throughout the migration.
You can learn more about Fleek’s IPFS gateway here.
That’s all for now. You can learn more about getting started with the new IPFS gateway in our docs, by joining our Discord server, or by following Fleek X.
Get started using the new Fleek IPFS Gateway:
Dive into IPFS Storage: https://fleek.xyz/blog/learn/understanding-ipfs-storage-fleek/
Host your dApp on IPFS: https://fleek.xyz/blog/templates/ethereum-boilerplate-ipfs-nextjs/